BookShark

Category: Organization

  • 5 Ways to Manage Your Big BookShark Binder without Lugging It Around

    5 Ways to Manage Your Big BookShark Binder without Lugging It Around

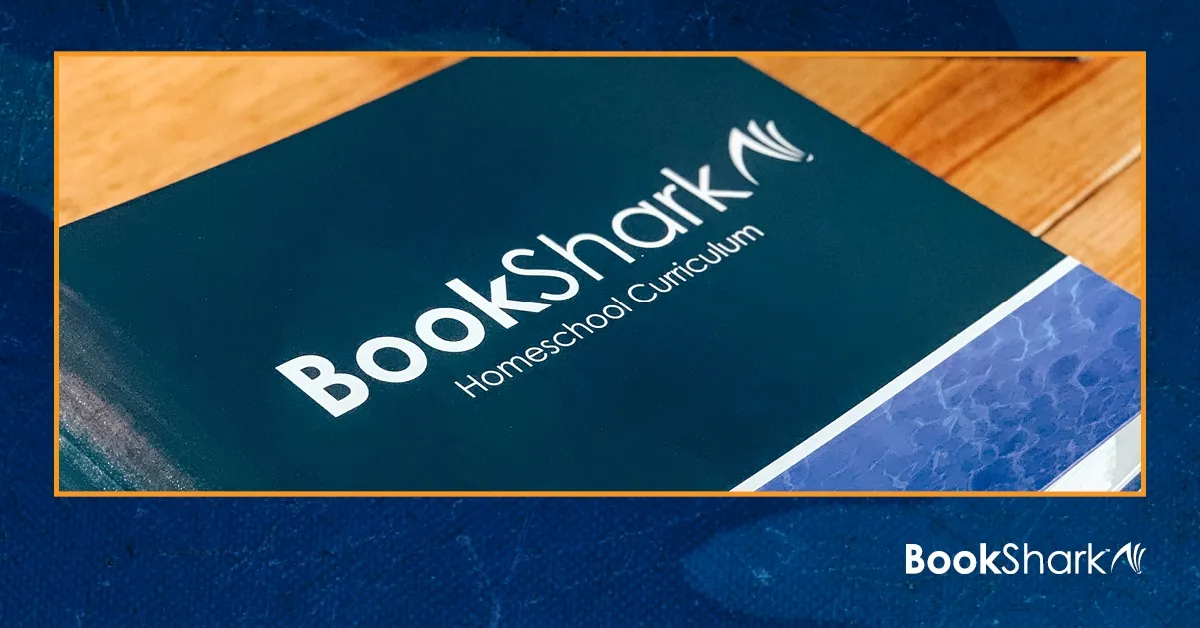
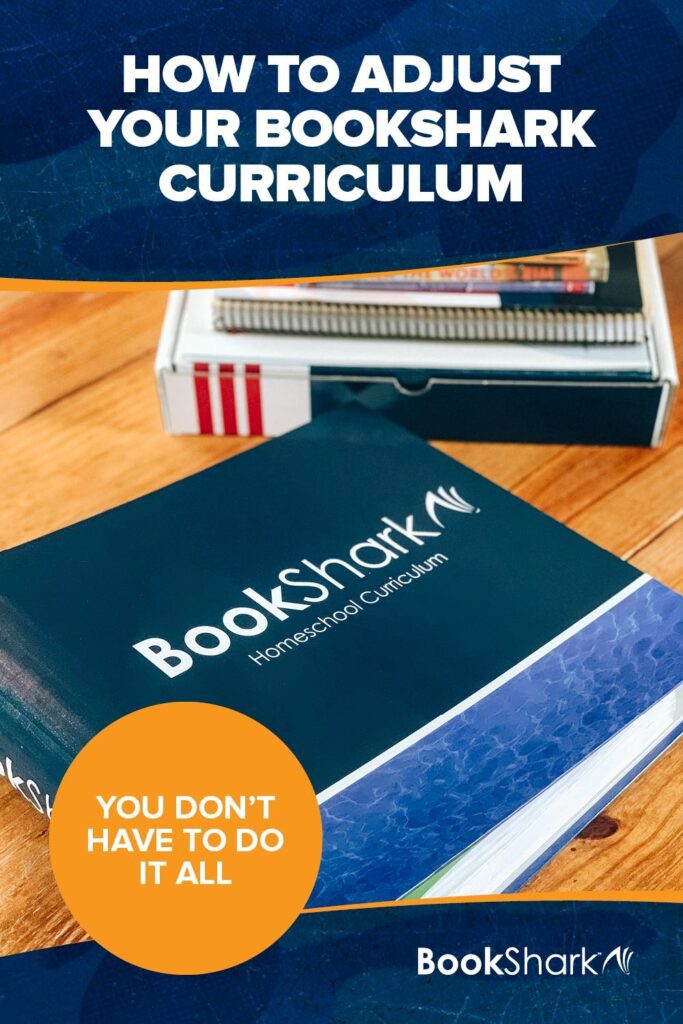
    The BookShark binder* is huge. It has to be to fit all of the information, lessons, and activity sheets included in the 36-week curriculum. We need the Instructor’s Guide that goes in the binder, but thankfully we don’t need to lug it around. 

    There are several ways we can keep our BookShark materials organized and accessible without wrangling a 3-inch notebook. If you’re like me and prefer to keep the big binder on the shelf, all you have to do is choose one of these five solutions. 

    1. Use a Working Binder

    A working binder is exactly what its name suggests: a binder that holds the things your homeschoolers are currently working on.

    This method works well if you plan units or like to build breaks into your homeschool year every six or eight weeks. Transfer the lessons to a smaller binder and when your child is finished with them, swap them for a new set of materials. 

    A working binder is also a great tool if you are using several different BookShark programs. Keep your current history, writing, science, and math units together, so you always have on hand exactly what you and your student need. 

    2. Use a Filing Crate with Hanging Files

    Some of us are just not binder people. It’s okay! 

    A hanging file system is another great way to organize your BookShark curriculum. All you need to do is put each weekly lesson into a separate file folder. If you have multiple homeschoolers, you might put their weekly lessons in the same folder so that you can grab one file at a time. Or you can choose different colored folders for each child. 

    Once you finish a lesson, move the file to the back of the crate or cabinet. Your homeschooler’s next set of lessons is now right up front, ready for them.  

    3. Use a Kids Binder and an Adult Binder

    My child loves school supplies and would be very upset if I were the only one with a binder. So she gets her own notebook, too. tory. Use reading strategies to craft your questions and discussions: 

    I always put all of her activity sheets in one binder and my Instructor’s Guide in another. She also likes to organize her supplies by subject, so her BookShark history lessons and writing assignments are in one binder while her BookShark science lessons are in another. These binders don’t have to be very big and give her the autonomy (and school supplies) she craves. They also lighten the load on my binder. 

    4. Spiral Bind Each Unit

    If you love to keep curriculum long-term, spiral binding each unit or several units is a beautiful way to save and showcase the lessons. Spiral-binding might be an easier way to travel with units or for younger children to use the materials. 

    Systems like the Happy Planner also allow you to punch holes into the materials and use plastic rings to bind the lessons together. 

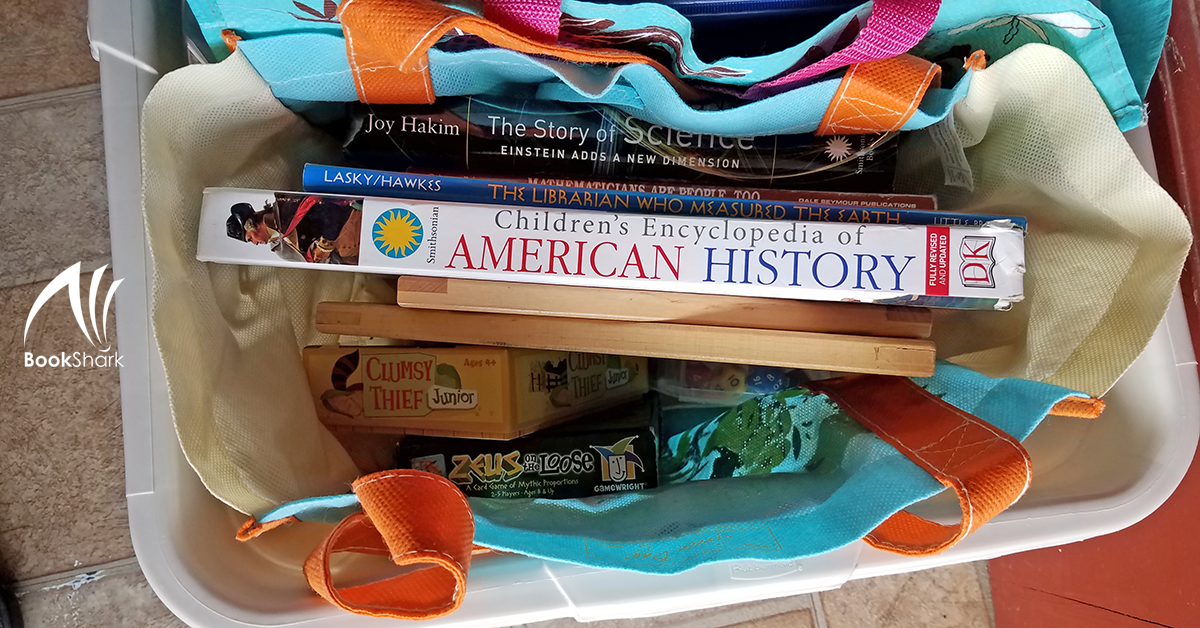
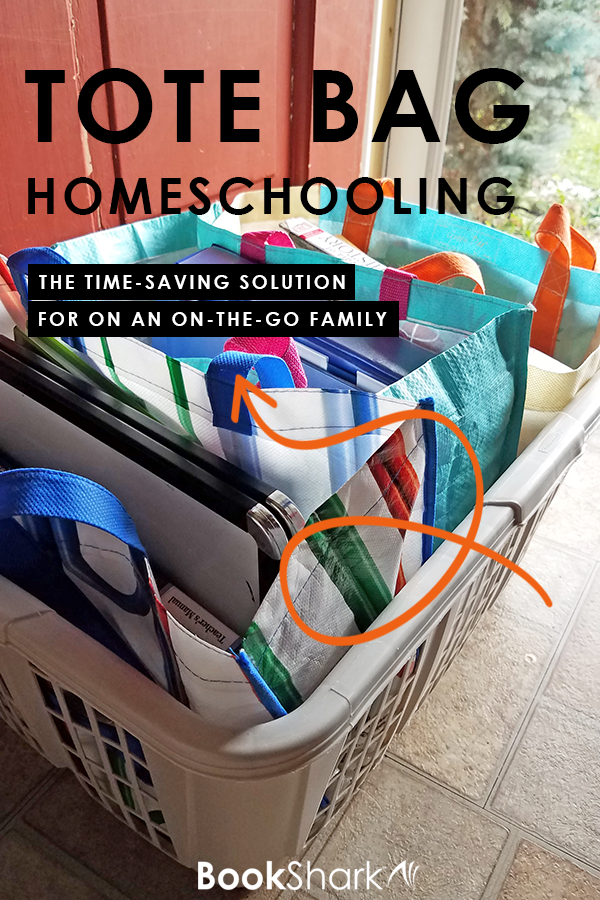
    5. Pull Out What You Need Each Week

    Perhaps the easiest way to keep yourself from lugging around your big BookShark binder is to pull out what you’ll need each week. Keep the materials in a folder or separate binder—whatever works for you. At the end of the week, put everything back into the big binder and pull out what you’ll need next week. 

    Practically speaking, the big binder is massive and takes up a good amount of space on the table.

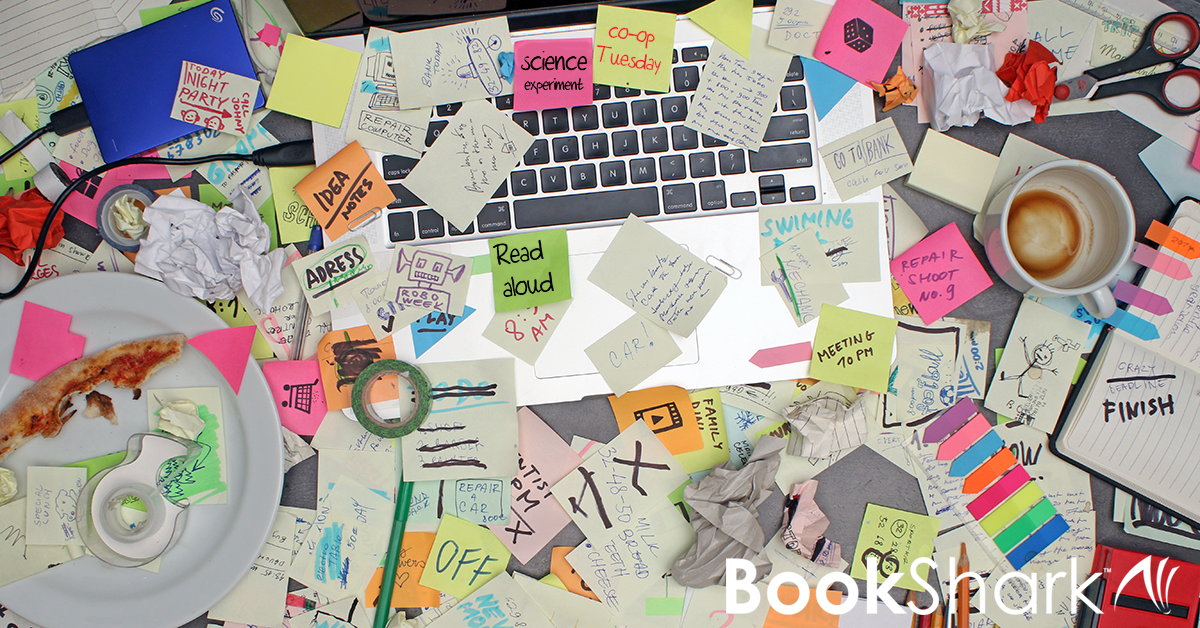
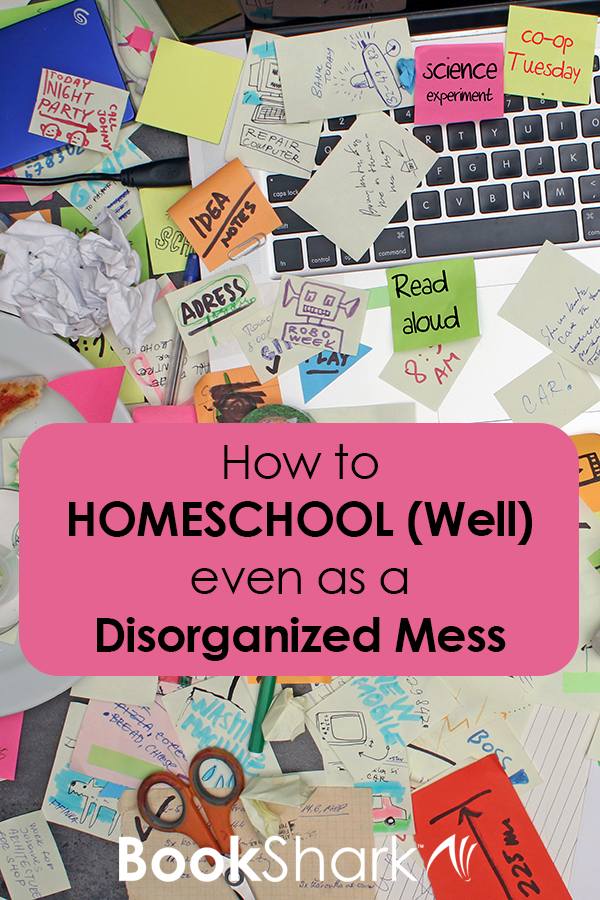
    There is another reason you might consider downsizing your binder: Some children get overwhelmed by seeing everything they will need to do in a year. Seeing a manageable amount of activity sheets or reading may dissipate the shock factor. If you feel overwhelmed by the number of lessons, it might help you feel less stressed as well. 

    Remember, homeschooling is not a race, and the BookShark curriculum is a guide. For some of us, it takes many more weeks or months to finish. And that’s okay! Staying organized and biting off (or filing) manageable amounts of materials can help. The most important thing is you use your curriculum how it works best for you and your homeschooler. . 

    *A BookShark binder is included in the Required Resources for All-Subject and Reading with History Packages. 

    About the Author

    Kelly left teaching middle and high school English to homeschool her children and reclaim how she and her family spent their time. Followers of interest-led learning, her family’s days rarely look the same, but they tend to include a lot of books, art supplies, and time outside.

    Kelly facilitates local writing circles for women and children and blogs about nurturing the love of learning on her blog, Curiosity Encouraged. She loves to journal, read memoirs, hike, and travel. She seeks quiet mornings and good coffee daily.

  • How to Schedule Your Homeschool Day

    How to Schedule Your Homeschool Day

    Homeschool scheduling is about finding your starting point and matching your family’s own groove. For example, when my boys were preschoolers and toddlers, my goal for the day was to shower and have some meaningful reading activities for my oldest son. Insanity was thinking I had to get my homeschool started at 8:00 a.m. when there was no need to. Fast forward to the middle and high school years. My sons now start their homeschool day closer to 8:30 a.m., independent of me.  

    The key to breathing sweet homeschool scheduling into your day is to begin with a set of guidelines that you can actually follow—ones that fit your family’s groove. We don’t need one more thing to stress us out if we are already struggling with homeschool scheduling, so look at these easy starting points below.  

    Analyze Your Family’s Routine and Daily Flow

    For example, if you have a younger household, your day will start earlier. When my household was younger, some days I could start school by about 7:00 a.m., stop for nap time, and then pick up again with a few more activities. Other days were helter-skelter.  

    Setting a dogmatic time to start our homeschool day only added to my aggravation because there was very little I could control when my children were preschoolers. Later, I understood that because my children were so young, I had to have a tentative game plan and find flexibility so that I could accommodate my family’s needs.  

    However, older children tend to thrive with routine and sameness even though we may not as adults.  

    Find Balance

    If you are not a morning person, then give yourself another half hour or so in the morning before you tackle your assignments in the Instructor’s Guide. However, if your children are morning people and they can start independently of you, then set the schedule to accommodate their desire to start early.  

    Think About the End of the Day

    When does your homeschool day end? Though learning and living naturally flow in our day, and sometimes it’s hard to see the difference between the two, we still want to schedule an ending to our day.   Through the years, I have heard of homeschoolers who homeschool for eight hours or more. I am shocked.  

    Our job as homeschool educators is not really very different from having a full time job. We need to have an ending to our day because homeschool burnout may loom ahead if we don’t.  

    During the younger years when there is not much difference between playing and learning, having an ending time is not as important. However, as your children approach the middle and high school years and you are teaching them to stick to a schedule and how to balance their time, it becomes critical.  

    Avoid Hour-by-hour Homeschool Planning

    When you are struggling with homeschool scheduling, avoid hour-by-hour planning and instead to plan bigger chunks of time.   Getting out your daily planner and setting aside 9:00 a.m. to 12:00 p.m. for homeschool is doable, flexible, and gets your feet on the road to homeschool organization.  

    Next, noting the hours 1:00 p.m. to 3:00 p.m. for house chores is pretty flexible too. Instead of chaining you to a homeschool schedule that might not work for you or that may be too specific right now, start with scheduling broad zones of time.  

    As you fine tune your homeschool schedule to fit your family’s rhythm, then you can fill in with hour by hour chores, academic subjects, and other activities you have planned.  

    The simple truth is that homeschooling requires time and a schedule that fits your family as your children grow. Fitting your family’s groove at the present moment, having an ending to your homeschool day, and planning in blocks of time are the beginnings of homeschooling scheduling success.   w out the topics they are interested in and can relate to, ask questions that spark opinions and more questions, and get excited about what will happen next. Your kids will follow suit and you’ll be digging in and having valuable discussions with them before you know it. 

    About the Author

    Tina Robertson celebrated the graduation of Mr. Senior in 2013 and is getting ready to graduate her next son. Because of her love for new homeschoolers, she mentors moms through her unique program called New Bee Homeschoolers. She loves all homeschoolers, though, as she shares her free 7 Step Curriculum Planner, unit studies, lapbooks and homeschooling how tos. She can’t sing, dance, or craft, but she counts organizing as a hobby. She is still in the homeschool trenches blogging at Tina’s Dynamic Homeschool Plus.

  • Tote Bag Homeschooling: THe Time-saving Solution for an On-the-go Family

    Tote Bag Homeschooling: THe Time-saving Solution for an On-the-go Family

    Are you in a season of on-the-go-schooling? Are you out exploring the world more than you’re at home? I know I am! Museum visits, sports practices, dentist appointments, weekend trips, co-op classes, piano lessons and countless hours in the car blanket our week.

    This constant motion means that our homeschooling has to be flexible. Sometimes reading assignments are tucked into the twenty-minutes hanging out in the waiting room or the forty-five minutes at the library between activities.

    At first, I didn’t think we could fit anything meaningful into these short shifts of learning, but I knew I had to find a way!

    My solution? Tote bag homeschooling!

    Next to my front door, you’ll find a laundry basket filled with tote bags of various kinds. As we waltz out the door, staying on track with learning is as simple as grabbing a tote. Let my bags inspire you to build carry-alls that meet the needs of your on-the-go family! 

    1. Tote Bag Homeschooling for All

    If you’re going to set up just one tote, this is the one. It has something for everyone—perfect for family-style learning! Here are some suggestions based on what’s in my own bag:

    • A card game or two
    • A juicy read-aloud
    • Drawing books and colored pencils
    • Journals for freewriting
    • Magnetic white boards 
    • Magnetic letter tiles for word play
    • A tablet for streaming documentaries 

    2. Tote Bag Homeschooling for One

    This kind of tote bag is designed for one learner and is individualized accordingly. Here is what you’d find in a few of ours.

    • Learner, age 6: phonics workbook and early readers, math book, a couple of picture books, a geography sticker book, crayons and unlined paper, audiobook player with earbuds
    • Learner, age 12: atlas and Markable Map, deck of cards for math games, writing journal, historical fiction book, tablet with science videos bookmarked
    • Learner, age 14: laptop for online math lessons and history videos, novel, science book, word roots game, colored pencils and drawing notebook
    • MomInstructor’s Guides, a few math manipulatives, a read aloud book, a box of granola bars

    3. Tote Bag Homeschooling by Topic

    This tote bag is focused on one subject area and the contents will vary depending on the topic. 

    • History Baghistory read-aloud, atlas, geography game, world history encyclopedia
    • Science Bag: field guides, nature notebooks, colored pencils, science books, science-themed games
    • Math Bag: deck of cards, snap cubes, math-themed read aloud, base-ten blocks, math notebooks, dice
    • Reading Bag: early readers, letter tiles, white-boards and markers, word cards, a phonics game
    • Fine Arts Bag: poetry anthology, art books, how to draw guides, markers, colored pencils, oil pastels, books about famous musicians, audio player with earbuds

    4. Tote Bag Homeschooling on a Budget

    This tote bag is inexpensive and versatile! It could be assembled with just a few items from the dollar store! 

    • Library books
    • Notebook and pencils for writing and drawing
    • Dice, a deck of cards, and dominoes for math games

    Homeschooling flows smoothly into the pockets of our days with grab-and-go tote bags! They don’t have to be fancy or overly involved. Build a few totes and line them up in your entryway so you’ll be ready for next day of on-the-go learning. Each bag can fit your family’s needs and the contents can change as often as you’d like them to! 


    With your purchase of an All-Subjects Package, you get a canvas BookShark tote!

    About the Author

    Angela Awald is a homeschooling mama to 6, certified teacher, writer, and doula. Her days brim full of learning, loving, and laundry (lots and lots of laundry)!! She believes that nurturing children (and ourselves) means helping them to see that all of life is about learning – from our mistakes, from each other, and from great books! Angela blogs at nurturedroots.net where she shares the ways she is nurturing her family and inspiration for nurturing your own.

  • How to Homeschool (Well) as a Disorganized Mess

    How to Homeschool (Well) as a Disorganized Mess

    Have you ever heard the myth that homeschool parents need to be extremely organized to successfully homeschool? Maybe you tell someone you homeschool and their reaction is, “Oh! You must be so organized!” Or you attend a homeschool convention and hear speaker after speaker talking about planners, schedules, calendars, and organizational systems as if those are more important that reading aloud and doing science experiments.

    Well, I strongly disagree with the assumption that you must be organized to be an effective homeschooler, and here’s why. I am a disorganized mess, and we have a very successful homeschool nevertheless!

    What do I mean by a disorganized mess? Here are a few examples:

    • I’ve never successfully maintained a planner.
    • We don’t have a single file folder holding school papers.
    • We use an open and go curriculum because preparing ahead of time never happens.
    • If we can find enough pencils for everyone to write at the same time, it’s a good day.

    Now you may be wondering, “If you are so disorganized, how do you ever get your homeschool work done?”

    First, I think it’s important to point out that kids do not need constant academic instruction. Most homeschooled kids can accomplish a lot of the more academic needs in a much smaller amount of time thanks to the small teacher/student ratio and the ability to move at the student’s pace.

    Second, kids learn a lot through everyday life. We don’t need to have a plan for every moment of the day for them to learn.

    Third, while many parents are organized, there are plenty of parents who are not at all organized. And you never know the whole story of someone else’s life. That super mom you are comparing yourself to may not be quite as organized as she seems from the outside looking in.

    Benefits of Being a Disorganized Mess

    Not many people see benefits to being disorganized. And truthfully, there aren’t many. I cannot tell you how many times I’ve bought two of the same item simply because I forgot I had bought it in the first place. That’s not an advantage of being disorganized.

    But being disorganized has allowed us to be a bit more spontaneous. Since we don’t usually have a set plan, it’s easy to take time off to explore a newfound interest. When we are in the middle of a lesson and my sons want to expand on it, we can. We can drop whatever we are doing and not worry about ruining our schedule (because we don’t follow one).

    How to Get Stuff Done in Your Homeschool

    When your mind opens to the reality of homeschooling, it can be overwhelming to think about all the possibilities that you could cover with your children. There are so many academic subjects plus extracurriculars, field trips, and supplements. I have two steps to combat the overwhelming feeling of trying to get it all done.

    • Simplifying. I write down all the subjects i want to cover in a year (or even semester). Then I rank them in order of importance. For instance, we would put math ahead of science and science ahead of coding, etc. Once I have my list, I consider what I can eliminate. Do I really need to do grammar lessons this year or is it something that could wait until my boys are older?
      I write everything that is left in order of importance and determine a basic routine to get it done. We do math twice a week, reading twice a week, and rotate history and science on a weekly basis. This very simple structure means we get things done without feeling hemmed into a strict regime.
    • Writing down my goals. What are my goals in homeschooling? Do I want my kids to gather all the possible knowledge they can? Or are my goals more about making learning fun? Knowing and understanding my ultimate goal helps me realize what matters and what doesn’t matter. Our main goal is to teach our kids how to learn. When we focus on only that, the overwhelming feeling of getting it all done is simplified to just one task.

    Choose the Right Curriculum

    A lot of successful homeschooling in general is choosing the right curriculum. Homeschooling as a disorganized mess is no different. For me, an open and go curriculum works best. When I can just sit down and start the lesson without prep work, it eases the effect of my disorganization. We are able to start any time we please without organizing the lesson first. I don’t need to have a planner or spend hours a week figuring out what we need to do. I just open the Instructor’s Guide and do the next thing.

    Not all curriculum can be open and go though. Any hands-on curricula will need at least a bit of preparation. I prefer programs either offer a concise material lists of items normally found in a household or a program like BookShark’s science that comes with a kit of required materials. That kit is a lifesaver for a mom who isn’t great at planning ahead.

    So when you’re searching for curriculum, consider how much prep time is required. If you’re a disorganized mess, you might want to stay away from ones that require more planning and stick with something that lets you open up a guide and do the next thing.

    About the Author

    Erin blogs at RoyalBaloo.com where she inspires people to make learning fun!  Through printables, games, activities, and unit studies, learning becomes an adventure worth having.

  • Homeschool Learning Spaces: Organizing Electronic Devices

    Homeschool Learning Spaces: Organizing Electronic Devices

    When you think homeschool learning spaces, the first thing that typically comes to mind is a nature center or a reading nook, or perhaps even an art center. But what about kids’ electronic devices? How do devices such as tablets and computers fit into your plan for a homeschool room?

    Our homeschool is not exclusively digital. We enjoy learning through booksscience experiments, and hands-on projects. But we still have several devices for our kids to use as part of their home education. Unless I stay on top of the device organization, those cords get tangled and tripped over. Laptops and tablets get unplugged and batteries go dead. We don’t have much space in our homeschool room so it’s more important than ever that I stay on top of managing these digital devices.

    How Many Devices Are Needed to Homeschool?

    Our eventual goal is one device per child, whether that’s a laptop, a Chromebook, a tablet, or a raspberry pi. However, for now, we have only been able to pull off three dedicated devices among our seven children. It’s not ideal, but it’s working for now.

    Having almost one device per two children makes it easy to stage and stagger lessons, especially where we still have physical lessons using books and tactile materials.

    We used to only have one device for all seven kids to share, and that was painful. It was incredibly annoying trying to get all of the kids a turn on the one laptop in a timely manner. 

    Choosing Devices For Your Homeschool Room

    Here are five questions to consider.

    1. How many kids are you actively schooling? This one is obvious, but the number of devices you need will obviously fluctuate based upon the number of kids you are homeschooling.
    2. What age are your homeschoolers? Older students will naturally have a need for more electronic time than younger students. If your students are older, you will need a smaller ratio of devices to students than if your students are younger.
    3. What style of homeschooling do you follow? Some styles of homeschooling will have a smaller need for electronics. For example, Charlotte Mason homeschoolers will generally spend more time in books than eclectic homeschoolers. The ratio of devices to students will fluctuate based upon your homeschooling style.
    4. What is your children’s level of independence? Some homeschooling families strive to get their kids working independently as soon as possible while others thrive in a cooperative setting. 
    5. How much money do you have to invest in more electronics? It goes without saying that your finances will determine how many devices you can afford. It might behoove you to buy one or two now and in a few years when you’ve got more money, you can invest in a couple more. 

    Unfortunately, my school room is not very large, but here are a few tricks I use to keep the electronics tidy.

    Child-Friendly Phone and Tablet Cord Organization

    If your kids are anything like mine, I’m sure you have gone through a painful amount of broken charging cords over the years. Even when my kids don’t use the devices, it seems like they are still always breaking the cords, either because the device got tripped over, tugged on, or plugged/unplugged incorrectly.

    I got so sick of always buying new charging cables that I finally invested in magnetic phone cables for our homeschool devices.

    These are great for kids because they are really easy to plug in. Even my 1-year-old can do it. These are also nice because when a cord gets tripped on, nothing gets ripped or bent wrong, and nothing goes flying either. These magnetic cords are a must for any homeschool room that uses portable electronic devices.

    And to minimize the number of plugins we were taking up, I invested in these fun little charger plugins that can accommodate two USB slots instead of just one. Now we can plug in double the devices with half the outlet space. Again, this is a must for a homeschool room with so many homeschoolers.

    Easy Laptop Storage

    We have three laptops in our family. One of these is specifically dedicated to our homeschoolers and our homeschool learning space, while the other two are more for the adults in the family. However, all of the laptops get used by the kids at least some of the time, which means we need a safe space for multiple laptop storage in our homeschool room.

    The nice thing about laptops is they fold up flat, making them easy to store. Right now, we just stack our laptops onto a shelf in our homeschool room. That way they are easy to access for anybody who needs them, but they are out of the way when not in use. Cords just get wrapped up loosely and set on top of the laptop pile until the next time we need them.

    In the past, we have also used small plastic containers to store our laptops. We found an inexpensive container in the dish drainer section of our local grocery store that was the perfect size for holding a couple of laptops with their cords. And as a bonus, our kids’ tablet also fit nicely in this container.

    Simple Electronic Setup

    When all of our devices are in use, you can imagine the tangle of cords that we deal with. On a regular basis, our school room consists of one tablet, one laptop, and one raspberry pi, and it’s not unheard of for us to add two more laptops and a phone or two, when circumstances require. Now that’s a lot of cords.

    In order to accommodate our large homeschooling family, our homeschool room has two extra-long folding tables. One of those folding tables just so happens to have a hole specifically designed for easy stringing of cords and cables, but we have made this setup work without one of these holes.

    The key to managing cords for all of these school devices is a multi-plug extension cord. We got a cord that was 6+ feet long and strung it from the wall to the table, up through that hole. We taped the cord down to the floor so the kids wouldn’t trip on it, and we taped the outlet part to the table so it wouldn’t get moved around by the kids.

    Now we still have a bunch of cords strung across our table, but it’s more manageable than if they were strung across the entire house. And this kind of setup would work nicely no matter how many devices or electronics you have in your homeschool room.

    For somebody who naturally struggles with organization, this has been a really simple and effective setup for our large homeschooling family.

    About the Author

    Charlene Hess spent many years teaching before she had her own kids. She now has 7 of her own, whom she has been homeschooling for the last 10 years. Although she still teaches other children outside of her home, she finds great joy in exploring the world with her family.

    Charlene has participated in many leadership trainings with John C. Maxwell. She and her husband blog about their homeschooling and parenting adventures at Hess Un-Academy.

  • Homeschool Learning Spaces: The Reading Nook

    Homeschool Learning Spaces: The Reading Nook

    No matter what style of homeschooling you follow, reading is probably a very strong part of your homeschooling journey because reading is one of the best ways to learn about the world, all from the comfort of your own home.

    • Unschoolers read. 
    • Relaxed homeschoolers read.
    • Charlotte Mason homeschoolers read.
    • Montessori followers read.
    • Classical homeschoolers read. 
    • All homeschoolers read!

    Since reading is a natural part of homeschooling, it’s only natural that you want your learning space to include a comfortable reading nook. But what do you do when you don’t have the space or the money to set up the reading nook of your dreams?

    How to Set Up a Reading Nook When You Have No Space

    Our family has lived in so many houses over the years that we often joke we are semi-nomadic homeschoolers. In all of our homes and in all of our learning spaces, we have somehow never ended up with a nice reading nook or a room dedicated to bookshelves and beanbags.

    But no matter our circumstances, I always make an effort to set up an area that invites the kids to snuggle up with a good book.

    Right now, our homeschool room is a corner in our basement toy room. There is not much space there for beanbags and couches, so the kids tend to do a lot of reading in their bedrooms, on their beds. The kids may keep the books they are reading in their rooms for accessibility, but the rest stay in the basement until they are needed for homeschool lessons. With this book storage system, my kids always have access to great reading material while books that are not in use are stored safely for future enjoyment.

    Informal Reading Space Ideas for Homeschoolers

    You don’t have to have a formal reading nook set up in order to include a reading space in your homeschool.  You can designate these areas for reading, at least part of the time:

    • Living room couch
    • Dining room table
    • Toy room floor (lie on a blanket)
    • Child-sized bean bag chairs
    • Child’s bed
    • Front or backyard (think blanket, lawn chair, porch swing, etc)
    • Cardboard box reading fort
    • Blanket fort

    Really, any place that the kids find comfortable for reading will work.

    Of course the couch or bed isn’t always a reading nook, but during reading time, each place transforms into serving the purpose. Maybe you have a special blanket, pillow, or other prop that signals the place is now being use for reading. 

    If your child is a relucant reader, working together to create an inviting space that’s reserved only for reading (at least during reading times) is a sneaky way to inspire more interest. 

    Think about fabrics, comfortable poses, and lighting when choosing and designing your reading nooks.

    In a large homeschooling family, it can be difficult for kids to find a quiet spot to read. But when there are a lot of comfortable reading options available, kids will have an easier time settling down to devour a book.

    If you have a specific time for independent reading each day, each child can go to their preferred reading nook.

    Practical, Child-Friendly Book Storage

    If you’ve ever tried to mix little kids and books, then I’m sure you have experienced the joys of kids using books as stepping stones – and the damaged books that follow these activities. I am embarrassed to say we have lost more than our fair share of books to this activity. 

    But kids have an easier time taking care of their books when they have an easily accessible spot for book storage.

    Book Storage for Little Kids: Baskets

    I don’t know about other homeschooling families, but I have never been able to get my little kids to put books back on the shelf regularly. And you can bet your bottom dollar that the preschooler is never going to get those books to stand up nicely on that bookshelf.

    So how do I store and organize books in a child-friendly way that still keeps the books accessible and well taken care of?

    Baskets are my solution!

    We have a handful of square wicker baskets for the younger kids’ books. The kids simply have to set their books in the baskets when they’re done reading.

    With the basket method, the books look tidy, they’re out of the way, and nobody uses the books as stepping stones. The real trick is teaching the kids to set the books in the baskets nicely rather than tossing them in from across the room.

    Book Storage for Older Kids: Shelves

    My older kids are capable of putting books on a bookshelf when they are done reading. So in addition to some baskets, we have a couple of bookshelves for their books.

    Sometimes the shelves are a nice fit and the books can stand up properly. Other times the shelves are an awkward fit and the books have to stack on top of each other. But as long as the spine is out and the books are orderly, I’m a happy momma.

    Currently, our homeschool room has really big and awkward shelving units. These are not even close to the proper size for a stereotypical book storage space. But that’s okay. We make do with what we have. One day when I’m rich and have my dream house, I’ll have wall to wall bookshelves filled with books. There will be homeschooling books, educational books, entertaining books, and more. I’ll put Belle’s library to shame. But until then, I am happy with the space, and the book storage, that I have.

    About the Author

    Charlene Hess spent many years teaching before she had her own kids. She now has 7 of her own, whom she has been homeschooling for the last 10 years. Although she still teaches other children outside of her home, she finds great joy in exploring the world with her family.

    Charlene has participated in many leadership trainings with John C. Maxwell. She and her husband blog about their homeschooling and parenting adventures at Hess Un-Academy.  

  • How to Use Lap Books with Literature-based Curriculum

    How to Use Lap Books with Literature-based Curriculum

    Visual aids work. It’s the reason companies spend thousands of dollars on an icon to represent their brand. The same principle works for us homeschool moms. When we can connect homeschool lessons to an interactive, visual learning aid, children will understand and remember more readily. If your children are crafty and enjoy cutting, coloring, writing, and assembling papercrafts, lap books are a fabulous way to add a visual and hands-on component to whatever curriculum you use.

    lap book is an interactive notebook with smaller mini books affixed onto a file folder. It’s a fun way for craft-loving kids to organize what they learn.

    • The creation of the lap book is part of the learning.
    • And then the reviewing of the lap book cements the learning for long-term retention. 

    Benefits of Lap Books with a Literature-based Approach

    Kids get more screen time now than ever before. While digital content has a place, it shouldn’t replace a child’s artwork, handiwork, and creativity. Lap books encourage a child’s natural desire to research, organize, and display the information they learned. What they create becomes a book of information they can reference later and be proud of.

    I’m always looking for ways to simplify what we’re learning and to make my teaching time count. Lap books do that for my kids! Although some families think that the time it takes to do lap books can be a turn off, I view them as a long-term investment. Almost ten years later, my sons still take out their lap books and review what they compiled when younger. And I can’t count how many times they reviewed the information through the years while explaining their current topic of interest to family and friends. 

    Do you have to create lap books to learn? Of course not! Many children (and moms) are content to read and discuss—the cornerstone of the literature-based approach of BookShark curriculum. But if enjoy lap books, then they are one more tool in your toolbelt for narration and composition.

    A lap book is also a portfolio of a child’s schoolwork. If you live in an area that requires annual documentation of learning, lap books are tangible and impressive proof of what your child has studied.

    After realizing that my sons didn’t have to use glitter or pompoms when making a lap book, we adjusted each lap book to suit each child’s learning style. It has been one of the most flexible tools I’ve ever used with a literature-based approach. If your kids are extra crafty, they can go all out with decorations. But if your children are less interested in embellishments and design, they can keep their work simpler. It’s up to you!

    Making foldable projects can help your child master things that require repetition or topics your child is struggling with. For example, if your child can’t remember the helping verbs, then encourage him to create a flip book that lists the words. Creating the book is a learning experience in itself. And then when your child lifts the flaps to recall the word list, the activity becomes active learning. Although you want your child to add tidbits of information which delight him, think of the lap book as a memory aid or reference tool to help your child recall information, too.

    Lap Books: Worthless or Worth Keeping?

    Mini books, graphs, charts, worksheets, maps, and writing can all be arranged in a lap book. This versatile learning tool can be adapted to each child’s needs, likes, and dislikes, and creative spunk. All you need are basic school supplies, you already have on hand:

    • file folders
    • glue stick or rubber cement
    • paper in various colors
    • scissors
    • tape
    • markers and colored pencils

    Then, look at your homeschool science or history lessons with an eye to dividing up chunks of information into small units that can be individual mini books or projects.

    • Is there a list? It will probably make a good lap book project maybe as cards or a flipbook.
    • Cause and effect? Another lap book project!
    • Vocabulary words? Yes, those too make for great lap book components. 
    • Events in a series? Display them in a small timeline format.
    • Diagrams? Perfect for lap books!

    Remember that a lap book doesn’t have to include everything you studied from a chapter or topic. Pick and choose the parts that your child finds captivating and wants to illustrate through papercrafts. Lap booking works perfectly in the narration stage of your homeschool lesson. After your Read-Alouds, ask your children to narrate back what they learned, using the discussion questions in your Instructor’s Guide. Then make a project for your lap book based on what your child narrated.

    You may want to create one or two minibooks a day depending on their complexity. A very elaborate project may stretch out over several days. Store each project in a ziploc bag as your child creates them. After your child finishes 10 to 13 minibooks, he can arrange them on a file folder base. 

    Tips for Using Lap Books with Your Homeschool Curriculum

    Here are a few dos and don’ts to avoid lap book pitfalls. 

    • Do cut some of the mini books for your child and fold some of the completed worksheets for him. Look at this tutorial for turning boring worksheets into interactive minibooks.
    • Don’t turn designing the mini books into a crafting session unless the child wants to. The emphasis is on the concepts learned and how they are organized not on the fancy coloring or cutting technique—again, unless your child thrives on that kind of crafty work.
    • Do remember that it takes time to build a lap book. So be patient.
    • Don’t try to cram every idea or teaching point into the lap book. Pick and choose.
    • Do remember that lap books are not only for young children. Lap books give older children a chance to organize the material they’re learning. And extra flaps can easily be added to lap books to accommodate compositions and drawings added by an older learner. 
    • Do integrate cleanup time into your homeschool day so you aren’t left with that chore by yourself.

    While anything you study for homeschool can easily be made into a lap book, many families love buying pre-designed lap book kits, like these for American History IAmerican History IIWorld History I, and World History II that provide the exact templates and directions for assembling them. If your children are extremely outside-the-box thinkers, you can use a kit as a springboard for their own designs. Just add additional flaps to the lap book base and add as many extras as you like! 

    Whether you are looking for a way to reinforce the major teaching points in your literature-based curriculum or are looking for a creative outlet for your budding artist-scholar, lap books are a method to try.

    About the Author

    Tina Robertson celebrated the graduation of Mr. Senior in 2013 and Mr. Awesome in 2015. Because of her love for new homeschoolers, she mentors moms through her unique program called New Bee Homeschoolers. She loves all homeschoolers, though, as she shares her free 7 Step Curriculum Planner, unit studies, lap books and homeschooling how tos. She can’t sing, dance, or craft, but she counts organizing as a hobby. She is still in the homeschool trenches blogging at Tina’s Dynamic Homeschool Plus.

  • Planning Your BookShark Homeschool in 3 Steps: From Box Day to Daily Lessons

    Planning Your BookShark Homeschool in 3 Steps: From Box Day to Daily Lessons

    So, you did it… You placed your order, eagerly stalked your shipment, and finally celebrated your BookShark Box Day! Whether you are new to BookShark or a longtime homeschooler, after happily unpacking your boxes and exploring the piles upon piles of books you just received, you may find yourself feeling a little intimidated. You might even be asking yourself:

    • Where am I going to put all of this?
    • Where do I begin?
    • How will we ever make it through all of these books?

    If you find yourself wondering about these things, don’t worry! You are not alone, and I am here to tell you it is not as scary as you might first think. With just a little bit of organization and preparation, you will quickly feel as though you have been using BookShark forever and maybe even have a few of your own tips to share.

    Organizing Your BookShark Materials

    1. Label

    The very first thing I recommend is labeling all the books in in your package. Some people like to put color coded stickers or write with Sharpies on the book binding, but I prefer sticking a mailing label on the inside of the book cover with the level written on it. With this method, if I lend a book out to someone all they have to do is open the book to see who it belongs to.

    (Time required: 10 minutes)

    2. Assemble

    Next, I assemble my Instructor’s Guides. BookShark has made assembling your Instructor’s Guide as painless as possible. The bottom of each page of the Instructor’s Guide lists these key parts:

    • Subject (Example: World History, Year 2 of 2)
    • What section the page is part of (Example: Section Two)
    • Week number (Example: Week 2)

    For this example, all of the pages with this label will be placed behind the Week 2 tab in the BookShark binder.

    (Time required: 10 minutes)

    3. Store

    Finally, it’s time to find a place to store your materials. I recommend using two separate shelves for each level—a student shelf and a teacher shelf. If your children are anything like mine, seeing a shelf full of all the materials they will be covering throughout the school year is daunting. I have one student shelf next to our desks that holds the weekly required materials and school supplies (pencils, erasers, dry erase markers, etc.).

    I store the rest of the materials on a teacher shelf on the other side of the room out of sight. By keeping only, the necessary materials close at hand, it is easier to find the books I need and to keep anxiety at bay.

    (Time required: 10 minutes)

    Phew! That wasn’t so bad, was it? It literally took me only 30 minutes to properly label, assemble, and store all of my books away. Now what about weekly preparations? I think you will be surprised by how little time is required to prepare for the upcoming homeschool day or week.

    Daily Homeschool Preparations with BookShark

    The daily preparations are by far the easiest steps to take. Since BookShark has everything completely scheduled for the week, I just quickly look over the assignments and discussion questions each day. This allows me to have an overview of what we will be learning about that day and to easily reach over and pull the assigned books off the student shelf.

    (Time required: 5 minutes)

    End-of-the-Week (or Beginning-of-the-Week) Preparations

    Since BookShark is planned to use a 4-day schedule, I dedicate a few minutes of my Friday end-of-the-week wrap-up with these tasks. Some moms prefer to do these on Sunday night before the week begins. Pick a time that works for you. 

    1. Restock the Student Shelf

    The end of the week is the perfect time to change out books. I put the books we have completed back on my teacher shelf, and add the new books we will be using in the upcoming week to the student shelf.

    2. Add Worksheets to Student Binders

    Next, I remove all the student activity sheets from the Instructor’s Guide and place them in the student binder.

    3. Gather Science Lab Materials

    Then I check the Science Instructor’s Guide to see if there are any household items required for the next lab assignment. I gather those plus anything we need from the included Science Kit in one area.

    (Time required: 10-15 minutes)

    It is as simple as that. At the start of the school year, you organize materials. Each week you do a bit of prep, and then each day you acquaint yourself with the assigned work. Your BookShark Instructor’s Guide carefully guides you through the rest.

    About the Author

    Roxanne Raiche is a book hoarding, coffee loving, homeschooling mama of three in Iron Mountain, Michigan. She is the voice behind Blushing Bibliophile.

  • 3 Common Misconceptions About BookShark Homeschool Curriculum

    3 Common Misconceptions About BookShark Homeschool Curriculum

    When you homeschool, you have extreme freedom:

    • freedom to choose the curriculum you want to follow
    • freedom to do schoolwork in the morning, afternoon, or evening
    • freedom to shelve schoolwork for a day and take a fieldtrip

    You, as the teacher, are the one shaping your child’s education.

    Yet most of us homeschooling parents, especially those of us who ourselves attended traditional school, have trouble letting go of the brick-and-mortar school mentality. It’s deeply rooted within us, and we may not even realize how much it is influencing us and our decisions when it comes to our children’s education. These hidden assumptions are demonstrated clearly in the many misconceptions people have about BookShark.

    Misconception #1: BookShark Levels Are Equivalent to Grade Levels

    Many people look at BookShark curriculum, and they automatically assume that each level corresponds to a grade, i.e. Level 5 is for a 5th grade student. While a 5th grader can certainly tackle Level 5, what most people miss is that BookShark gives an age range for each level. Level 5, for instance, is recommended for ages 10-13, which means it can be used for what is traditionally thought of as 5th – 8th grades!

    I encourage parents to choose the BookShark curriculum along the upper end of the age range instead of the lower one. Using Level 5 for ages 10-13 as an example again, I suggest this curriculum is better suited for the typical 12 and 13 year old (the upper age range) than the lower range of ages 10 and 11. You know your child best. Is your child sensitive? Go with the upper age range. Is your child especially mature or gifted? Then you may want to try the lower range. 

    This rule of choosing along the upper end of the age range is especially valid for higher levels that include sensitive topics. For instance, my son used Level 5 in 7th grade at age 12. One of our favorite books was the read-aloud A Moment Comes which deals with weighty issues. While he would have understood the book at a surface level as a 5th grader, his added maturity as a 7th grader helped him catch nuances and implications that he would have largely missed at a younger age.

    Request a catalog here so you can compare the age ranges of all BookShark programs.

    Misconception #2: Your Child Will Fall Behind If He Isn’t at the “Right” Level

    Even after hearing the advice to teach your child using the BookShark Level where he is at the higher end of the age range, many parents just can’t do so. Why? They’re afraid that their child will “fall behind” if they’re doing Level 5 as a 7th grader. They worry that if their child is doing Level 7 as a 9th grader, he’s actually completing a middle school curriculum as a high school student.

    Yet look at everything your child is learning. In Level 7, your child will read 26 novels. I’m sure that most brick-and-mortar high school freshman are not reading that many books, nor are they reading books of the same quality.

    However, it is true that you may need to change some aspects of the curriculum if your child is at the high age range. For instance, a high school freshman is not likely in pre-algebra, which is the math curriculum used for Level 7. That situation is easily remedied by customizing your Math selection. Just choose the Algebra package instead. (By the way, for help customizing a package, just email or call BookShark.)

    As a parent who loves BookShark and has seen what tremendous knowledge children get from being on the higher end of the age range, I say your child will not be behind his peers with this curriculum.

    Misconception #3: Students Aren’t Learning Because They Aren’t Taking Tests

    Here is the last, and perhaps strongest, misconception from our own school days—to learn something, a student must take a test.

    Think back to your school experience with tests. Was it like mine? I crammed furiously, hoping the information stayed in my brain long enough to make at least a B on the test. Then I promptly forgot it all because I didn’t learn the information in a genuine way.

    We all know that an A on a test doesn’t mean the information was internalized. An A could merely mean that the information was memorized, only to disappear in a few weeks or months.

    Because BookShark students are learning in a genuine way that is more likely to pique their interests, they’re more likely to remember what they read.  In addition, after every section of reading, there are questions to monitor your children’s reading comprehension and to dive more deeply into the events and ideas. These discussions about what you are reading is one of the best parts of BookShark, and they are a superior substitute for tests.

    Students are learning more—without tests—because they’re learning much more deeply.

    If you bring a brick-and-mortar school mentality to BookShark (and it’s hard not to if that’s the way you received your own education), you may have these three misconceptions. But rest assured, BookShark provides a quality education, just in a different way than a traditional school. For me, that makes it a much stronger curriculum.

    About Our Author

    Melissa is a homeschool mom to three kids. BookShark is her primary curriculum, and she and her kids love it! When she’s not homeschooling, she’s either shuttling kids from one activity to another or working from home as a freelance writer. You can read more about Melissa’s homeschool journey at her blog Moms Plans.

  • You Don’t Have to Do it All: How to Adjust Your BookShark Curriculum

    You Don’t Have to Do it All: How to Adjust Your BookShark Curriculum

    I’ll admit it; the giant blue binder that came with my daughter’s BookShark Reading with History curriculum was a little overwhelming. I remember unboxing day. While my kid flipped through her new books, excited by all the stories she was going to read, I unwrapped a ream of paper—my Instructor’s Guide (IG). 

    Never having had success with a boxed curriculum before, I’ll admit, I was a little skeptical. But BookShark felt different. The BookShark Science curriculum and US Elections Lap Book we had already used were a hit with both my daughter and me, so . . . deep breath . . . I needed to give this history curriculum a chance. I’m so glad we did! 

    Not only does our BookShark curriculum reduce the amount of time I need to prep for our lessons, it provides us with countless opportunities to read and learn together. I’ve found the teacher’s guide is just that, a guide. We can easily choose which lessons we follow, where we want to take a deeper dive, and which ones we skip or return to at a later date. 

    Feeling overwhelmed or a little uncertain about the plethora of materials in a BookShark curriculum? Never fear! You don’t have to do it all. Here are ways to pick and choose from your BookShark curriculum so it’s a perfect fit for you and your homeschooler. 

    Let BookShark Be a Flexible Guide

    When it comes to curriculum, I can get caught up in thinking I need to do it all exactly the way it’s laid out. The problem with this is sometimes my homeschooler wants to do things a little differently or needs a lesson altered. Sometimes she needs more time to read a book or buzzes through an activity and is ready to move on. 

    What I’ve found, thanks to BookShark, is a good curriculum offers options and ideas I can easily take and make my own. Below are the ways I adjust BookShark curriculum to meet the needs of my homeschooler.

    The Weekly Schedule Pages

    One of my favorite parts of BookShark curriculum is the weekly schedule grids. (See samples here.) Easy to read and modify, they lay out a concise plan. You can follow it as is, working down the assignments for each day. Or if your child prefers to stick with a book rather than skipping about, you can work across the page, reading the full week’s worth of passages at once. It’s up to you!

    Here’s how I use the IG pages. Each week, I flip to the new week’s plan and skim through what is suggested. Then I go back to the previous week and check to see what we are still working on. I cross off the things we’ve completed so it’s easy to see which lessons, pages of a book, or activities we have yet to finish. 

    To keep track of what we’re working on, I put a sticky note on the weekly schedules we need to complete. There’s plenty of room on these sheets to write down other things we’re doing or any modifications. On the rare occasion we are going to skip an activity or reading, I just cross it out.

    36 Weekly Dividers 

    The weekly dividers are useful guides in that they help me keep track of the units we’re working on, but I don’t worry about what week we’re on or push my homeschooler to finish everything listed in one week’s time. 

    When we started our BookShark Reading with History curriculum, she was not a confident independent reader. We used the independent books as Read-Alouds, so it took us longer than was suggested. This was okay! I homeschool because I am not interested in flying through lessons just to get them done. 

    Now, just three months in, my daughter reads on average a book a week independently. Her remarkable achievement is a testament to how reading awesome books and discussing them does, in fact, grow readers. Moreover, it’s possible that by the time we’re in the second half of the curriculum, she could be ahead of the weekly schedule. This is also okay! 

    BookShark curriculum is organized in such a way that we can easily adjust the lessons and move at our child’s pace.

    So you can follow the weeks as they are outlined in the IG. Or you cand do what I do and just work through the material in the order laid out but not necessarily in the time frame (week by week) that it’s laid out.

    BookShark Books

    The number of books provided with the BookShark curriculum is impressive yet can be overwhelming due to sheer quantity.

    Remember this: The great thing about a book is it doesn’t expire.

    Again, I had to remind myself of this when we started our curriculum. It’s okay if your child doesn’t read every single book provided or if they don’t read it at the exact time it’s suggested. 

    Guess what?! We have skipped a book here and there, and it’s okay! Why? Because my daughter was ready to move on or we wanted to take our time with a book she was really loving. We can always go back and read the books we skipped later.

    Permission to skip books is fully granted! 

    BookShark Lessons

    My daughter is learning all about the Eastern Hemisphere. She loves filling in the maps, reading and discussing the novels, and exploring the different countries and cultures. Taking notes is challenging however, since she is listening to me reading about a country’s history or reading about it herself. We use the history text provided as a guide as well. We use it for its maps and pictures, skim it for information, and supplement the text by finding documentaries and videos. We also use the notes provided for me in my IG to help her write down notes. She’s learning all of the information she needs to learn in a way that works for her and that’s what matters. 

    No one knows our kids like we do, so finding a perfect curriculum that meets every one of their needs is unrealistic. BookShark clearly understands this, so their curriculum’s provide learners with an organized Instructor’s Guide and tons of resources that can easily be adapted to fit the needs of each learner. Nowhere in the curriculum does it suggest you have to do it all. Our children will get a well rounded education no matter how we tailor it to meet their needs. 

    • Follow the plans weekly or as you see fit.
    • Read all the books or read some now and others later.
    • Choose which books your homeschooler reads independently and which ones you read together.

    What’s important is your child has a guide (that’s you), and you have a guide—your BookShark curriculum. With both of these in place, the love of learning happens over and over again. 

    About Our Author

    Kelly left teaching middle and high school English to homeschool her children and reclaim how she and her family spent their time. Followers of interest-led learning, her family’s days rarely look the same, but they tend to include a lot of books, art supplies, and time outside.

    Kelly facilitates local writing circles for women and children and blogs about nurturing the love of learning on her blog, Curiosity Encouraged. She loves to journal, read memoirs, hike, and travel. She seeks quiet mornings and good coffee daily.