BookShark

Category: Blog

  • What to Do When Your Child is Bullied by a Teacher

    What to Do When Your Child is Bullied by a Teacher

    I am the product of public school, and cannot say enough how much I loved my experiences growing up. Yes, I stumbled across a few bad apples during my 13 years as a public school student—one overtly racist teacher, one teacher who made no attempts to hide his very pleased gaze, one teacher who cursed like a sailor, and more. But overall I knew that these teachers were not representative of the profession as a whole, and I truly loved school. 

    When it came time for my own children to start school, it was a no-brainer. Public school was the only option. I’d loved it, my husband had loved it, and our kids were going to love it. 

    And they did… for a while

    My oldest child is a people-pleaser and brilliant—exactly the kind of student every teacher would want in their class. He makes their jobs easier and never makes waves. My middle child, however… well, if you have more than one child, you’re aware of how very different that second born child tends to be from the first! 

    When My Child Became a Target

    My middle child is not an easy student. He is profoundly gifted, sarcastic. He questions everything he learns, which is an admirable quality in an adult but not one that is so warmly embraced in a classroom of over 20 children. He was already several years ahead of where his classroom curriculum was teaching, and he is not the kind of child to sit quietly and wait patiently to be challenged. 

    Eventually this middle child of mine became a target. Not by his peers nor by the parents of the other children. No, instead he found himself in the crosshairs of members of the school administration. Actual adults who showed up to work every day at a school, supposedly dedicated to the care and advancement of children, went out of their way to chastise, dismiss, constrain, and persecute an 8-year-old child. 

    His hard-fought IEP paperwork was never filed legally; his accommodations were intentionally dismissed. One staff member in particular made it her mission to knock my son from his presumed pedestal and jeopardized his mental health in alarming ways. When he was intentionally placed in a classroom his IEP strictly forbade him from entering, she said, “He should be able to handle it.” When his extensive IQ testing hinted at possible dysgraphia, she said, “If he’s this smart, he’ll be able to figure it out.” The real doozy, though, the jewel in the cruel crown this adult bully wore, was when she filed a bullying report against my son because of his high IQ. “He can run circles around the other students with his vocabulary, and there’s no way they could keep up.” You read that right. Because my son has an extensive vocabulary, she had him formally declared a bully. 

    Are you mad yet? Because I sure was.

    In fact, I spent most of his few years in public school seething with rage. I had other children at this school, and they definitely never encountered these issues. My youngest had several years ahead of him at this school, so I didn’t want to rock the boat too much. Teachers are often protected by layers of bureaucracy and paperwork. What exactly could I do? 

    I could do anything my child needed, and I’ll tell you how to do the same. Here are my angry-mom tips on what to do when your child is being bullied by a teacher.

    1. Document Everything

    This is the most important step and the first thing you should start doing. Every story that your child comes home with, immediately record it in any way you can. Type the details into emails, record with your phone, make note of the date, names of any other children who may have witnessed what happened, your child’s emotional state… all of it. Any emails that you receive from the bullying teacher, save them. If your class has a Facebook group or an app where photos of daily activitiesare shared, look carefully to see what your child is doing in them. Is he placed in a corner, away from the fun? Is he being left out? Is he unhappy and to the side? Save these, date them, and document everything. 

    2. Work Up the Ladder

    Once you have documentation to back up your complaints, start by sending an email to the principal, outlining your issues. Be sure to copy any vice principals, the grade level chair, and possibly even the superintendent’s office. Don’t start with the superintendent, but don’t be afraid to include them either. Every level of leadership in your school district has a higher level they’re accountable to, and sometimes it takes seeing their boss’s name on an email to get your complaint taken seriously.

    Request an in-person meeting with the principal. If you still are not satisfied or if you feel dismissed, then proceed up the ladder. And remember to keep documenting everything along the way, copying the next person up the leadership ladder on every email you send. 

    3. Stay Squeaky

    I am a non-confrontational person by nature. I don’t like rocking the boat, ruffling feathers, or calling people out. But when it became apparent that my discomfort with confrontation was costing my child in mental wellness (and allowing an adult to bully a child), I had to get loud.

    You’ve heard the saying that the squeaky wheel gets the grease, right? The same is true when advocating for your child. You will have to get loud, frequently. You will have to send emails, lots of them.

    You will have to tackle the feeling that your requested meetings are inconvenient to administrators, stop hoping that everyone in the room likes you, and get squeaky. Squeak all over that office. Squeak in every meeting. Don’t let your concerns be quieted with charm and half-attempts at justice. Don’t let your child pay the price for being uncomfortable calling out people in power.

    Squeak for your child.

    Squeak and squeak and squeak until someone finally realizes your wheel really does need the grease. 

    4. Consider Your Alternatives

    Sometimes, despite the most meticulous documentation, running appropriately up the ladder, and squeaking non-stop, nothing gets changed. Sometimes a teacher’s bullying behaviors may be dismissed, allowed, or even defended. Sometimes the one-size-fits-all model of public education just doesn’t fit all, and you have to consider your options.  

    • Keep your child in the same school. You will have to be a constant presence in the office, advocating and fighting and squeaking, making a full time job out of hoping the school does the right thing. 
    • Consider private schools. These schools are often not within most families’ budgets, and as they are not bound by the same standards and requirements as public schools, you could very well find yourself in a similar situation with fewer avenues of accountability.
    • Look into homeschooling. It’s not what you think it is, and it’s not what it used to be. Use this guide as a starting point. There are near-countless opportunities for the ever-important socialization worry, co-ops, parental support groups, and freedoms. Programs like BookShark empower a parent to lead their child in academics with a flexible 4-day week that eases the transition from working parent to a homeschooling parent. 
    • Run for a seat on your city’s school board. If being a squeaky wheel hasn’t afforded you the opportunity to see change, then perhaps becoming a part of the wheel will allow you the influence to begin steering it. 

    Should you ever find yourself in a situation where your child has become the target of a bullying adult, where your child’s mental health and educational well-being are jeopardized because someone in power cannot control their own biased feelings and actions, you are not alone, and you are not helpless. You can fight for your child. You don’t need to make friends with everyone on staff. You walk your child through those front doors as a pathway to their future, not your own popularity. Risk your reputation for your child. Squeak for your child. Do whatever you need, whatever is best, whatever will rescue your child and put them in an educational option with an adult who truly cares for them. Your hard work may end up saving future children from the same abuse.

    About Our Author

    Jennifer Vail proudly lives in the great state of Texas with her very handsome husband and three very funny children. All three kids are educated in three very different ways according to their very different needs, which is exhausting but fulfilling. Jen’s hobbies include naps, 90’s pop culture, Netflix binges, buying books with the best of intentions to read them all, photography, and extroverting. She holds a degree in counseling but has found her calling by writing for and spending time with families of differently-wired, outlier kids—the square pegs of the round world.

    She stays up way too late and drinks way too much caffeine, but has no intention of changing either. She is the community manager and contributing author at Raising Lifelong Learners where she writes about homeschooling gifted, anxious, and otherwise different kiddos, but also rambles at This Undeserved Life from time to time. She feels compelled to mention that she still very much loves the Backstreet Boys and rarely folds her laundry.

  • When Mom Has ADHD: Tips for Parenting and Homeschooling

    When Mom Has ADHD: Tips for Parenting and Homeschooling

    Parenting a child with ADHD is difficult. For a mom with ADHD, though, it can feel nearly overwhelming.

    There are the typical symptoms of ADHD, which often pose a challenge to a person’s ability to think clearly on demand. But, since parents with ADHD are more likely to have children who also have the disorder, these moms may struggle to manage both their own symptoms and those of their child.

    How can moms with ADHD cope with the stresses of their own lives while parenting and homeschooling successfully? These tips for the ADHD mom can help. (Really! I use them!)

    Tips for Living as a Mom with ADHD

    • Do one thing at a time. Multi-tasking is almost impossible for moms with ADHD. Giving each task full attention reduces the likelihood of mistakes and becoming overwhelmed.
    • Delegate. Moms already have a lot of responsibilities, so it’s easy to become burdened with things to do. Teaching kids to help out around the house can make this load easier to bear.
    • Be realistic. No mother should have to be a superhero. Being reasonable about the amount of things that can be done each day will help to avoid frustration.

    Parenting as a Mom with ADHD

    • Slow down. Moms with ADHD may experience racing thoughts that can make it difficult to parent with patience. To avoid a meltdown, try to slow down and approach each situation calmly.
    • Develop a routine. A predictable routine can make it easier to structure the day ahead. Keep things simple by developing a natural rhythm that can be followed by everyone in the family.
    • Expect the unexpected. Parenting is full of unexpected moments. While a routine is helpful, it cannot predict the events that will arise each day. Ease stress by giving yourself time to manage last-minute needs that kids may have.

    Homeschooling as a Mom with ADHD

    • Focus on the essentials. Some mothers who have ADHD may tend toward hyper-intensive planning. Since homeschooling already requires a fair amount of planning, these mothers may overwhelm themselves with lesson plans, activities, and state objectives. Instead, concentrate on the most important subjects and approach the others with a more relaxed method.
    • Use a block schedule. Unlike timed schedules, which require that each lesson be completed by a certain time, block schedules consist of time slots for each subject. This routine can be easier for moms with ADHD to follow because it allows for structure without adding the stress of a timed deadline.
    • Be flexible. No matter how well in advance a lesson is planned, homeschooling parents will always need to make adjustments. If a child dislikes a curriculum or if the lesson doesn’t get completed, learn to be flexible enough to move a lesson to another date or remove it from the plan completely. As long as the objectives are covered each year, the actual method doesn’t really matter.
    • Get help. Some homeschooling moms put pressure on themselves to teach every subject. Instead, enlist the help of family members or friends to help kids with some subjects. This frees up the parent to focus on the material that she can enjoy learning with the kids.
    Homeschooling when you Have ADHD

    Living with ADHD will never be easy. Using these tips, though, can make some of the most difficult aspects of life with this disorder manageable for moms. In fact, even moms without ADHD will probably benefit from applying these same survival skills.

    About the Author

    Selena is a homeschooling graduate and a veteran homeschooling mother of four, including three with ADHD. She and her husband, Jay, use an eclectic homeschooling approach to encourage their children to learn throughout their lives. Selena blogs about her family’s homeschooling adventures every week at Look! We’re Learning! 

  • 6 Ancient Egypt Activities to Do at the Kitchen Table

    6 Ancient Egypt Activities to Do at the Kitchen Table

    Are you studying ancient civilizations for homeschool history, for example BookShark Level 1 or BookShark Level 6? If so, you will probably find that ancient Egypt is one of the most fascinating topics you’ll cover. In addition to your scheduled reading, your child will probably enjoy supplementing with interactive, hands-on activities.

    Are these extra activities necessary? Not at all! But some families truly enjoy making crafts and engaging in creative projects, and when those activities can connect to homeschool history lessons, it’s all the better. Here are five relatively simple hands-on activities for ancient Egypt that you can do in your kitchen with supplies you already have in your home.

    Activity 1: Mummify an Apple

    If you search online, you’ll find all sorts of things that you can mummify, including a chicken. If you’d prefer something a little smaller (and possibly less gruesome), try mummifying an apple!

    • Take a large tin can and drill holes in the bottom (so the liquid can drain).
    • Cut an apple into quarters.
    • Put the apple in the tin can.
    • In a separate bowl, mix together 1 cup salt and 1 cup baking soda. Pour this mixture over the apple and set in a place where the liquid can drain.
    • Wait two months before digging out your mummified apple!  

    As an alternative, you can mummify several apples, all in different containers, and take one out every two weeks to see the mummification process as it occurs. This way, your history lesson overlaps into a science experiment!

    Activity 2: Build a Sugar Cube Pyramid

    Buy a box or two of sugar cubes and ingredients for plain white icing (not frosting).

    Have your child figure out how big the base of the pyramid should be based on the number of sugar cubes that you have. She’ll need to determine how many sugar cubes will make up the base and how many levels will be built from there. (Math!)

    Use a piece of sturdy cardboard or a baking sheet as a base. Then simply use white icing as glue to hold the cubes together. If you don’t want to eat the creation later, you could lightly spray it with tan paint or even create an elaborate diorama around it, complete with sand, tiny camels, and the Nile river.

    Activity 3: Build a Toothpick and Marshmallow Pyramid

    If you’d like to build a bigger pyramid than the sugar cube one, try building a pyramid out of toothpicks and miniature marshmallows. The marshmallows connect the ends of the toothpicks, so your child can easily build a very large pyramid.

    Activity 4: Write Your Name in Hieroglyphs

    Print out this translation of the alphabet in hieroglyphs (PDF) and have your child practice writing his or her name. Or try your hand at simple sentences summarizing facts about ancient Egypt for an innovative way to narrate your history lesson. Use the colors traditionally used in ancient Egyptian art to embellish the cartouches you create: green, red, blue, yellow, white, and black.

    Edible Project 5: Mummy Dogs

    This project is silly and not a bit authentic. But it’s fun, so it’s perfect for the little kids. You’ll need one package of hot dogs and a container of crescent rolls.  

    Put one crescent roll on the counter and with a knife, slit it into narrow strips on each side, while leaving the middle intact.  Put the hot dog in the middle, and wrap the hot dog with the crescent strips. Make sure to leave a space for the face.  Bake as directed, and then use a dot of ketchup to make the eyes.

    6 Ancient Egypt Activities to Do at the Kitchen Table

    Edible Project 6: Date Balls

    What a yummy snack! You’ll need 1 cup dried, pitted dates, ½ cup walnuts, two tablespoons water. In a food processor, mix together the dates, walnuts, and water. Puree until a paste consistency. Roll these into balls and enjoy.

    Optionally, you can coat the balls first in 2 tablespoons of honey and then in ¼ cup crushed almonds.

    If hands-on projects and cooking experiments make you crazy, remember, you don’t have to do these to give your children a top-notch education. But if you find you are in a rut, the kids are getting antsy, or you have especially artistic children who are hankering for more crafts, try adding a project into your week on your fifth day without BookShark lessons. If anything else, you will have special family bonding time and you’ll be keeping your kids away from screens for a few minutes. Don’t worry about the product you are creating. Even if it doesn’t turn out quite right, the experience itself is worthwhile.

  • How to Keep Homeschool Records with 2 Free Digital Tools

    One of the most worrisome parts of homeschooling is record keeping; especially for those homeschooling families who live in places with strict homeschooling laws. And just because you live in a homeschool friendly place right now doesn’t guarantee you will never move to a place that requires you to keep regular records of your kids’ home education.

    No matter where you live, it is always a good idea to keep at least a minimal amount of homeschool records.

    As an adult, I struggle with organizational skills. Tax season has always been a pain because I spend several weeks digging around the house, trying to find something else to include in my tax paperwork. Heaven forbid we ever get audited. And don’t even ask where my kids’ immunization records are.

    What can I say? I just hate paper. Binders and folders and boxes of paper have never been my thing. Even if I do end up putting everything away in a semi-neat manner, I still can never manage to find the paper I’m looking for. In fact, I’ll admit that our family’s most important paperwork, including but not limited to birth certificates, social security cards, and tax paperwork, all get shoved in a ziplock baggie which is hidden in a secret location in my room.

    Yes, I said it. Our family’s most critical papers are reduced to a zip lock bag.

    Charlene Hess

    So how can I talk to you about the importance of keeping and organizing homeschool records? Because of the wonders of digital organization methods, of course.

    Benefits of Digital Homeschool Record-Keeping

    • No more paper messes 
    • It’s easy to find things with the help of the FIND function (CTRL+F)
    • Records don’t get lost in a move or a disaster, thanks to the cloud
    • Sharing records is easy
    • Digital records save space
    • If necessary, it’s simple to make physical copies

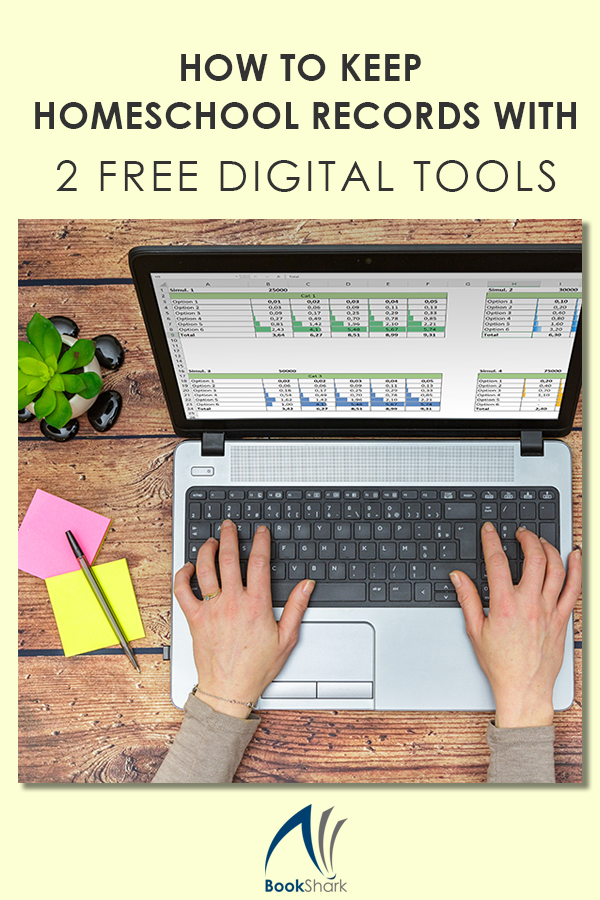
    Let me show you how somebody who struggles with organization keeps track of all the most important homeschooling records with two free online tools: Google Sheets and Trello.

    1. Keep Track of Homeschool Attendance with Google Sheets

    Many states require parents to keep homeschool attendance records. Some places even require a certain amount of educational hours in order to be in compliance with the law.

    I am been lucky enough to have always lived in places with pretty lax requirements when it comes to attendance, but I know that this could change at any time, whether due to a move or a new local law being passed. And even if things don’t change, I am probably going to need records such as these when my kids hit high school age and we start looking into creating transcripts for college entrances.

    I have started keeping track of my kids’ homeschool attendance with Google Sheets because it is easily accessible from anywhere. Whether I’m in the school room, in my bedroom, or on the road somewhere, I always have a device that can access Google Sheets.

    At the beginning of the year I set up a sheet entitled Homeschool Attendance Records [school year] with 12 tabs for the 12 months of the year. (We homeschool year-round, so I include 12 months. If your school year stretches across fewer months, you can use that many tabs.) I then put the days and dates of the month in left-hand columns and my kids’ names in the top row.

    In Google Sheets, you can put a checkbox into any cell with three steps:

    • Select the cell where you want a checkbox.
    • Select insert from the menu.
    • Select checkbox.

    And voila! Your checkbox will appear. Once your checkboxes are inserted, it is easy to check or uncheck a box from any device that has access to this Google Sheet. 

    Because of our personal homeschool schedule, I have set up my attendance report to be very flexible and inclusive. This setup allows for spontaneous days off or to do schooling on Saturdays. And remember, field trips count as a learning day, so I am always sure to count those, no matter what day they fall on.

    This attendance tracker makes it easy to record which kids did schooling on what day. My sheet is also easily adjustable should I ever move to a location that requires hours of learning rather than just days. And should the need to share or present these records with somebody ever arise, that’s only a click away.

    2. Keep Track of Homeschool Academics with Trello

    Trello is a project management software that works well for homeschool families who need a little more organization but are overwhelmed by the very idea. 

    My Trello set-up is not very fancy. Each of my children has a list for their assignments and lesson plans as well as a list for their records and completed projects. I add to Trello whatever assignments each student has for the week/month/semester. Then as they complete things, all I have to do is drag and drop the card from one list to the other.

    If the kids complete an offline project that I want to have a visual record of, such as an art project or history project, all I have to do is take a picture with my phone and upload the picture as an attachment to the associated card.

    3. Issue Homeschool Transcripts and Report Cards with Google Sheets

    Homeschool report cards can be nice to have for your own personal records or to send to Grandma. Some local spots that reward kids for good grades don’t exclude homeschoolers from their perks! With a report card you made yourself, your kids can get in on the benefits. 

    I threw together a simple report card template for my own needs. It shows each semester, broken down by core courses and elective courses. Any extracurricular activities we are participating in go into the electives section.

    How to keep Homeschool Records

    If you want to start keeping and issuing a report card in your homeschool, you can easily make your own with Google Sheets. 

    At the end of the year, I make note of whether the child passed that grade, and then we set up the next year’s homeschool records.

    All of these tips combined make for a simple and mostly stress-free homeschool record-keeping style whether you are doing it for yourself, for your kids to look back on in years to come, or to satisfy state requirements.

    About Our Author

    Charlene Hess spent many years teaching before she had her own kids. She now has 7 of her own, whom she has been homeschooling for the last 10 years. Although she still teaches other children outside of her home, she finds great joy in exploring the world with her family.

    Charlene has participated in many leadership trainings with John C. Maxwell. She and her husband blog about their homeschooling and parenting adventures at Hess Un-Academy.  

  • Building a Home Library of 500 Books

    Building a Home Library of 500 Books

    A study conducted by the University of Nevada over a period of 20 years using data from 27 countries found that families with books in the home (even as few as 20), had children who attended school between 2.4 years and 6.6 years longer than children who lived in homes without books. The researchers indicated that a library of 500 books provided the maximum educational value.

    The study also found that the presence of books in the home had twice as much affect on a child’s perseverance in attending school than the education level of her or his parents.

    Having a home library could mean the difference between a child who becomes a doctor and a child who drops out of high school. The data from the study makes it obvious that building a home library—print, digital, or a combination—is essential for long-term academic success for homeschoolers.

    Purchasing 500 books to create a homeschool library could cost several thousand dollars—a price tag that is beyond the reach of many families. Luckily, you don’t have to purchase all of your books all at one time or at full price. The following resources help you build a home library for much less than retail value. By spreading out your purchases over several years with these tips, you can build that 500 book library and stay well within budget. 

    Thrift Shops

    The thrift shop is one of my favorite places to search for books because I can find both recently published books and classic editions. My local thrift shops usually charge $2 or less for most books. Taking a road trip? Look for thrift stores on the road to break up the trip and build your library at the same time.

    Library Sales

    Every year, my local library has a Friends of the Library sale where I can get quality books for  $1 or less. Ask your library when their sales are, and sign up for email notifications.

    Wise Curriculum Choices

    When you select homeschool curriculum, choose materials that will build a library of books that beg to be read or referenced again and again. A literature-rich curriculum like BookShark offers real books that you will be happy to store on your bookshelves for years to come instead of reselling at the next used curriculum fair. After a few years of buying BookShark complete packages you will be close to the magical 500 book mark.

    Friends & Family

    I am lucky enough to come from a long line of book hoarders who give us books for free. Let friends and family know that you are happy to look through their unwanted books, and you are sure to end up with some great titles. Remember that your homeschool library can be built from all kinds of topics, genres, and formats.

    Homeschool Book Fairs

    At homeschool book fairs, most families are willing to sell their gently used books for reasonable prices, and some may even be willing to do a trade with you. I once purchased the entire set of A Series of Unfortunate Events for less than $10 at a book fair.

    Garage/Estate Sales

    Garage and estate sales will be hit-or-miss because you won’t know if they are selling books until you go, but you can find books here that you won’t find anywhere else (except perhaps eBay). Some of my favorite vintage coffeetable books were found at estate sales.

    As a bonus, most garage/estate sellers know books are hard to move so they will probably give you an amazing deal if you buy several books. Don’t be afraid to negotiate for special prices.

    Building a home library

    Second Hand Book Stores

    You have to be careful at second hand book stores. The prices are less than new books, but even at half-price, you can easily spend hundreds of dollars in one trip. For that reason, I usually reserve trips to the second-hand bookstore for buying titles on a wishlist rather than browsing.

    About Our Author

    Brenda Priddy is a professional writer and homeschooling mother to two girls in Dallas, TX with a passion for books, DIY, and creative education. Her blog, STEAMsational, is all about homeschooling, crafts, green living, and fun. Keep up with the fun here!

  • 50 Ideas for Volunteering as a Homeschool Family

    50 Ideas for Volunteering as a Homeschool Family

    It’s easy to get wrapped up in the academics of homeschooling. From planning history lessons to grading math tests, educational pursuits can quickly fill up every square inch of brain space. However, in order for our children’s education to be balanced, they need time outside of the home. If they can consider the needs of others in those activities, all the better!

    There are so many wonderful hands-on learning experiences available by volunteering together as a homeschool family. With the flexibility of a homeschool schedule, many of these projects can be easily worked into your regular routine. You may even want to set aside your fifth day with no BookShark lessons especially for volunteer projects.

    Start by finding your family’s main interest; then seek out service opportunities to complement those strengths. When you get creative together, you can find something you enjoy that will also strengthen the community around you. Here are 50 ideas to get you started:

    Crazy About Animals

    Food Focus

    • Deliver a warm meal with Meals on Wheels
    • Work at a food bank
    • Serve a meal at a local homeless shelter
    • Partner with a Feed My Starving Children event
    • Create blessing bags to have on hand to give out to homeless
    • Gather and donate food to a local food bank
    • Grow vegetables and share them with those in need

    Books on the Brain

    • Tutor at a local elementary school
    • Read stories to younger children at a local school/library
    • Volunteer at your local library
    • Donate books to a homeless shelter for children
    • Donate books to the library for their fundraising sales
    • Pack a back pack with school supplies for local schools to give to children in need

    Show A Little Love to the Military

    50 Ideas for Volunteering as a homeschool family

    Connect With Your Local Community

    • Bring cookies, coffee, or other treats to your local fire or police station
    • Donate stuffed animals to S.A.F.E., a non-profit organization that provides comfort for children experiencing traumatic events
    • Participate as a lawyer or juror in a local Teen Court
    • Volunteer at your local police department
    • Give a helping hand at a community theater with creating sets, ushering guests, or participating in a performance

    Environmentally Friendly Volunteering

    Volunteering Opportunities for a People Person

    • Serve at a nursing home
    • Entertain elderly with music
    • Volunteer at Ronald McDonald House
    • Join with the Salvation Army in a variety of service projects
    • Volunteer at or join in on a fun run for a favorite charity
    • Volunteer at a local hospital

    Find More Opportunities to Volunteer as a Family

    No matter where you choose to serve, giving of your time and talents will not distract from your child’s education; rather it will enhance it.

  • How to Teach Spelling to Kids in a Fun Way

    How to Teach Spelling to Kids in a Fun Way

    It wasn’t all that long ago when I was desperately memorizing another spelling test and another set of words just to forget them over the weekend. When I was in school, we were given an assortment of 15 or 20 random words that we were expected to simply know. The problem with spelling lists and weekly spelling tests is that the information is not assimilated into other subjects. We do not learn the correct spelling to use in our writing. Instead, we learn the spelling for the test and then immediately forget it.

    While learning the intricacies of spelling in any language is challenging, we do have patterns in English (along with plenty of exceptions). But most words we can learn to spell with a rule. So throwing together a list of words with no rhyme or reason does not suit the person learning the words. And testing on the list of random words will not help anyone learn the words on a long-term basis.

    Five Problems with Weekly Spelling Tests

    1. The teaching often lacks a basic level of understanding. When a lesson is introduced on the basic level, we can build on that information. But throwing someone into the top level without the basics is going to leave them confused.

    2. Spelling tests do not indicate spelling ability. For some students, a good score on a spelling test will reflect their ability to spell. But mostly, spelling tests indicate that someone can memorize words for 24 hours.

    3. Learning should be meaningful. People learn best when they can attach meaning to information. A student who decides to investigate a new topic, such as the Apollo 11 space mission, may learn to spell new words like lunar module. The spelling of those words will probably stick with them because they are meaningful. However, if those words were placed on a spelling test without context or interest, learning to spell them would be considerably more difficult.

    4. Rote memorization does not work. We know that rote memorization is not the best way to learn for most people. Items learned with rote memorization may enter short term memory, but rarely do they enter long term memory.

    5. Isolated learning does not extend to other areas. When learning is isolated, or learned in only one context, the information does not always make its way to other areas. Learning to spell a word on a list does not mean that it will be spelled correctly when used in writing. The information was learned for the test itself and not for writing.

    How to Teach Spelling Without Weekly Tests

    1. Choose a spelling system that uses logical progression. A system that teaches spelling words in logical groups is a good place to start. Kids can start by learning how to spell cat (c-a-t) and then extrapolate that information to spell sat, bat, hat, mat, etc. By learning the rule, they’ve learned to spell more than five words instead of just one.

    2. Investigate spelling in context. When your child develops an interest in a particular topic, place a bit of focus on new vocabulary and the spelling of those words. Interest will undoubtedly lead to learning. In this way, your spelling words can come from history lessonsscience lessons, or read alouds.

    3. Regularly assess spelling ability. It serves no purpose to let a student fall behind in their spelling ability. There are assessments that can be done to indicate where spelling abilities may be lacking. Unlike a test in which a word is expected to be memorized, an assessment will include many different word patterns to see where a student may lack understanding. At that point, future spelling lessons can target problem areas to adequately learn the rules.

    How to Teach Spelling to Kids in a Fun Way

    4. Create a word wall, personal dictionary, or journal. Provide a space where words can be displayed or used for reference. New words may be added as they are learned and the entire book can be used during writing activities.

    5. Games. Once you’ve decided on the best method to introduce new spelling words for your kids, you can practice with games. If they understand the rules behind the spelling, the games can help them cement that knowledge.

    Spelling tests are not an efficient way to teach spelling. But we have tools at our disposal to make spelling successful. Like anything, it takes a lot of repetition and patience, but over the years, your children will learn how to spell!

    Author Erin Brown

    About our Author

    Erin blogs at Royal Baloo where she inspires people to make learning fun!  Through printables, games, activities, and unit studies, learning becomes an adventure worth having.

  • 32 Virtual Field Trips for American History

    32 Virtual Field Trips for American History

    When we venture out on field trips, our kids get first hand experiences that a book can never mimic. At the same time, homeschool field trips can be stressful, time consuming, and sometimes expensive. Weather is an added factor to consider with outdoor events such as a Civil War re-enactment. 

    One alternative to packing snacks, loading the van, and buying tickets is the virtual field trip. These online explorations can awaken your child’s love of American history. Besides supplementing your American history curriculum, virtual field trips also provide a way for your child to explore places that may be inaccessible.

    If you want to spice up your study of American history, look at these 32 virtual trips and a list of easy ways to enhance them.


    American Civil War

    Ways to Enhance a Virtual Field Trip

    Virtual field trips can be just as enriching and interactive as a physical one as long as you plan ahead. For example, print out a notebooking page or prepare a scavenger hunt for kids to fill out. Many websites provide these kinds of helps in the educational resources section of the domain. Do a little hunting prior to your virtual visit to make the most of any freebies the site offers. Some children may like to work as they explore while others will want to totally immerse themselves in the experience and make notes only after the field trip is over. 

    To make sure your virtual field trip doesn’t become a passive affair, incorporate a hands-on activity before or after. BookShark has Lap Book Kits for both American History Year 1 and Year 2 that could work as field trip follow up in many cases!

    About the Author

    Tina Robertson celebrated the graduation of Mr. Senior in 2013 and Mr. Awesome in 2015. Because of her love for new homeschoolers, she mentors moms through her unique program called New Bee Homeschoolers. She loves all homeschoolers, though, as she shares her free 7 Step Curriculum Planner, unit studies, lap books and homeschooling how tos. She can’t sing, dance, or craft, but she counts organizing as a hobby. She is still in the homeschool trenches blogging at Tina’s Dynamic Homeschool Plus.

  • What is the Best Time of Day to Learn for Children? Homeschooling to Personal Rhythms

    What is the Best Time of Day to Learn for Children? Homeschooling to Personal Rhythms

    For our family, paying attention to time is a huge piece of why we homeschool:

    • having enough time for things we love
    • spending time together
    • learning at the times when we feel our best

    I homeschool because I want my children to have time to learn and follow their passions. For us, this means we don’t follow a traditional school schedule. Depending on the day, season, year and the outside classes my children take, our learning might happen in the early morning or late afternoon.

    I’ll be honest. Sometimes I love our rhythm, and other times it’s challenging. I’m a morning person and prefer to get going right away. My nine-year-old is a night owl and has been since birth. Her creative juices get going about bedtime.

    While I am not willing to practice math facts late into the night, a recent question in a homeschool group regarding homeschooling in the evening, got me wondering: Are there certain times in the day that are better for homeschooling?

    What’s the Right Time of Day to Homeschool?

    Research suggests, yes, there are times in the day (or night) when our children learn best. Giving Students the (Right) Time of Day by Roger John Callan in the journal Educational Leadership discusses how looking at our circadian rhythms can help determine the best time to learn.

    The only caveat is that our rhythms vary. Callan says,

    "Subsequent research has confirmed that some people reach their temperature peak before noon, some in the afternoon, and some in the evening. Hence, a picture emerges of the morning person, afternoon person, and evening person."

    My daughter and I are clearly on different rhythms.

    So, what is the best time of day to help each individual child learn? Callan says,

    “In the best of all possible worlds, each school district would have three parallel systems. The principal school for the majority of students would hold classes in the late morning through the afternoon. Two smaller schools—one open earlier in the morning and the other in the evening—would cater to the remaining students. Classes would begin just as the students began to approach their period of peak efficiency and understanding. For most students, according to the research of Dunn and Dunn (1993), that time is mid-morning—about 11 a.m. A significant number of students, however, are morning people. And there are evening people, as well.”

    In the article, Does Time-of-Day of Instruction Impact Class Achievement?, Amanda J. Wile and Gary A. Shouppe, out of Columbus State University agree. They considered a number of studies centered around the best times to teach children and found, “Learning-styles research reveals increased learning occurs when a student is taught and assessed at their preferred time-of-day.”

    The National Sleep Foundation also agrees but notes our circadian rhythms can change: “Changes to this circadian rhythm occur during adolescence when most teens experience a sleep phase delay. This shift in teens’ circadian rhythm causes them to naturally feel alert later at night, making it difficult for them to fall asleep before 11:00 pm.”

    While finding the right time for each child to learn, might feel impossible or even be impossible considering class schedules and family needs, paying attention to our children’s circadian rhythms may add insight when kids are struggling or feeling frustrated. It might make homeschooling feel a little more doable or explain why some of our kids are paying attention during reading time and others are flipping off the couch.

    In order to find the best time for our children to learn, we have to pay attention to several factors.

    Pay Attention to Sleep

    When does your child naturally fall asleep? When do they wake up? I have an early riser and one child that can only be compared to a snail in the morning. Is it possible to read or do math with your early bird and let your night owl sleep in a little?

    While we may assume it’s easier to have everyone learning at the same time, an individual schedule for each child could make learning a lot smoother.

    Pay Attention to Energy

    While a child’s energy level can certainly be linked to sleep and food, they can also have times of days they need to move. My son is ready to move the second he wakes up. When he was little, we often went on morning bike rides before breakfast. We’d get home, eat, and then he was ready to learn something new in his curriculum. If I tried reading with him before he moved, he could not sit still.

    Pay Attention to Hunger

    I am a fan of meal times. We sit down together as a family at least once if not twice a day. My daughter is rarely hungry during these times. She picks at her food and inevitably goes back to it later, once we have all finished. For years I tried to make her eat, and for years she told me she wasn’t hungry. Finally, I listened. Now, she happily sits with us (because family time is really why we are gathering) and eats later when she is actually hungry. This, in turn, helps her feel better and our learning time goes smoother.

    Pay Attention to Quiet

    We all need quiet. It recharges us and actually gives us energy. For my daughter, she seeks quiet when she wakes up. It’s important I give her plenty of time to wake up, get ready, and eat breakfast. She’s happy to get up earlier if it means she has this time. Rushing her out the door is never a good idea and always starts our day badly.

    Pay Attention to Focus

    My son is most focused mid-morning, my daughter at mid-afternoon and evening. I’m focused early in the morning while my husband is the oposite, preferring late at night. While we can’t always learn and work during our ideal times, it’s helpful to know this about ourselves and try to accommodate when we can.

    In a perfect world, our children learn when their bodies and minds are in sync. But let’s be honest, regardless of whether we are homeschooling one child or seven, it’s not always possible to give our children the exact thing they need at the exact moment they need it. Paying attention to their circadian rhythms does not mean we homeschool from dawn till dusk.

    It means we pay a little more attention and use the information when and if we can. It means we recognize why our children may be having a hard time sitting still and let them take breaks or jump on the trampoline. We don’t feel discouraged if our child is reading well past bedtime, or worry as much about having everyone do math at 10 am. Paying attention to each of our children’s natural rhythms (and our own) helps us remember that we are learning at our own speed and there is no one right speed in which to learn.

    Kelly Sage

    About the Author

    Kelly left teaching middle and high school English to homeschool her children and reclaim how she and her family spent their time. Followers of interest-led learning, her family’s days rarely look the same, but they tend to include a lot of books, art supplies, and time outside.

    Kelly facilitates local writing circles for women and children and blogs about nurturing the love of learning on her blog, Curiosity Encouraged. She loves to journal, read memoirs, hike, and travel. She seeks quiet mornings and good coffee daily.

  • How to Make Epsom Salt Crystal Ornaments

    How to Make Epsom Salt Crystal Ornaments

    Astound your children by turning a pipe cleaner into a delicate crystalline decoration! 

    This craft is easy to accomplish with minimal mess. Enjoy it as a simple handicraft project or take it a step further and learn some of the science behind the activity.

    This particular tutorial uses a star shape, but of course, you can form the ornament into whatever shape you’d like for any holiday or just everyday crafting! 

    • Make letters and to spell out initials, names, or words.
    • Make leaf or pumpkin shapes from orange pipe cleaners for fall.
    • Make hearts out of red pipe cleaners for Valentine’s Day.

    If your shape is large, you may need to create a double batch of epsom salt solution. For multiple children doing this craft, each child will need their own crystal forming solution. Or you could mix up a much larger batch and suspend multiple ornaments into it as long as they aren’t touching each other or the sides of your container. 

    Supplies Needed Per Ornament

    • 1 cup water, hot but not boiling
    • 1 cup epsom salt
    • embroidery thread, string, bakers twine, or ribbon
    • scissors
    • 1 pipe cleaner 
    • 1 stick, straw, or pencil
    • jar or other container*

    *Make sure your container is wide and deep enough to submerge your pipe cleaner ornament in the epsom salt solution without touching any edges or the bottom of the jar. 

    Epsom Salt Crystal Ornament Directions

    Read through all the directions and watch the video first so you have the big picture of where this craft is heading. Then go back and follow the steps one by one.


    Science Background

    To take the activity farther, learn some of the science behind your activity. 
    Read pages 66-67 from the Usborne Illustrated Elementary Science Dictionary, part of Science E Package. Discuss solutions, suspensions, and separating mixtures. Ask your children these questions about the activity:


    Q. What is our solute? 

    A. The epsom salts

    Q. What is our solvent?

    A. The hot water

    Q. Did we create a solution or a suspension

    A. Solution

    Q. How did we partially separate our mixture?

    A. By letting the epsom salts reform as crystals on the pipe cleaner, we removed much (but not all) of it from the liquid solution. 

    Q. How could we remove all the epsom salts from the solution?

    A. By boiling it or simply allowing it to evaporate naturally.

    How to Make an Epsom Salt Crystal Ornament

    Look at the seven types of crystal shapes here.

    1. Cubic or Isometric
    2. Orthorhombic 
    3. Monoclinic 
    4. Triclinic 
    5. Trigonal
    6. Hexagonal
    7. Tetragonal

    Q1. What shape are our epsom salt crystals?

    Q2. What is the chemical name of epsom salts?

    A1. Monoclinic—cylindrical rods or spikes

    A. Magnesium sulfate (MgSO₄)


    Hands-on Science Projects for Kids

    Want more hands-on projects? For science activities, shop BookShark’s Science Experiments + Science Kit combos (or opt for the complete science curriculum packages they are part of).

    hands on science experiments
    Hands-on

    Hands-on History Projects for Kids

    For history-themed activities, shop BookShark’s Hands-on History Kits and Lap Book Kits.