BookShark

Tag: History

  • 5 Reasons to Keep a History Timeline

    5 Reasons to Keep a History Timeline

    With history’s constant expansion, it’s easy to understand why homeschooling the subject may feel a bit daunting. How can children begin to grasp how it all fits together? There are so many people, cultures, continents, and events!

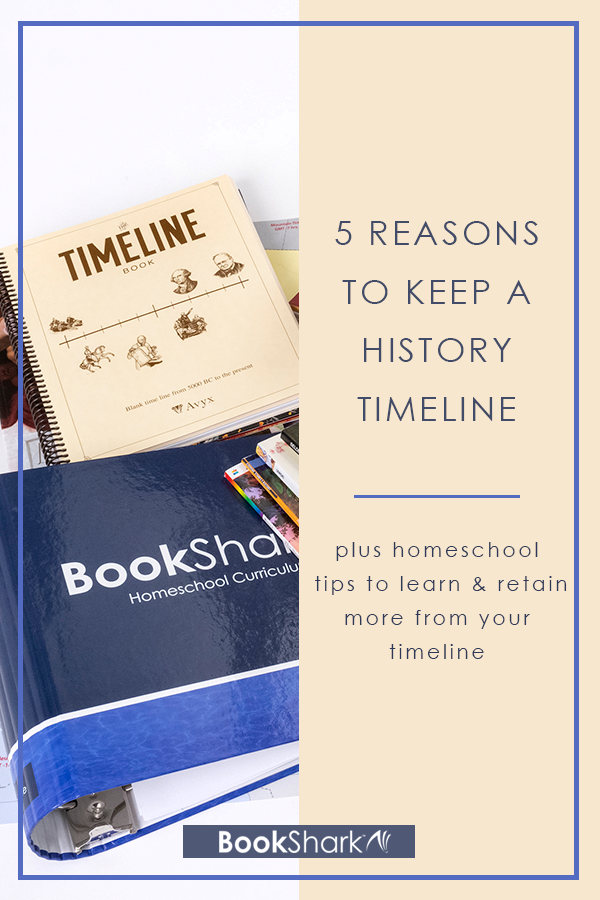
    One answer is a history timeline.

    Timelines come in a variety of formats, but one thing is consistent. Whether it’s vertical or horizontal, there’s a dated line that helps students put information in chronological order. 

    Students can create history timelines for a variety of reasons:

    • to study a specific era or region
    • to see the events of a person’s life
    • to trace the development of a particular subject—like the evolution of art or progress of scientific discoveries
    • to compare the histories of multiple countries at the same time
    • to give context to a person’s life or an event

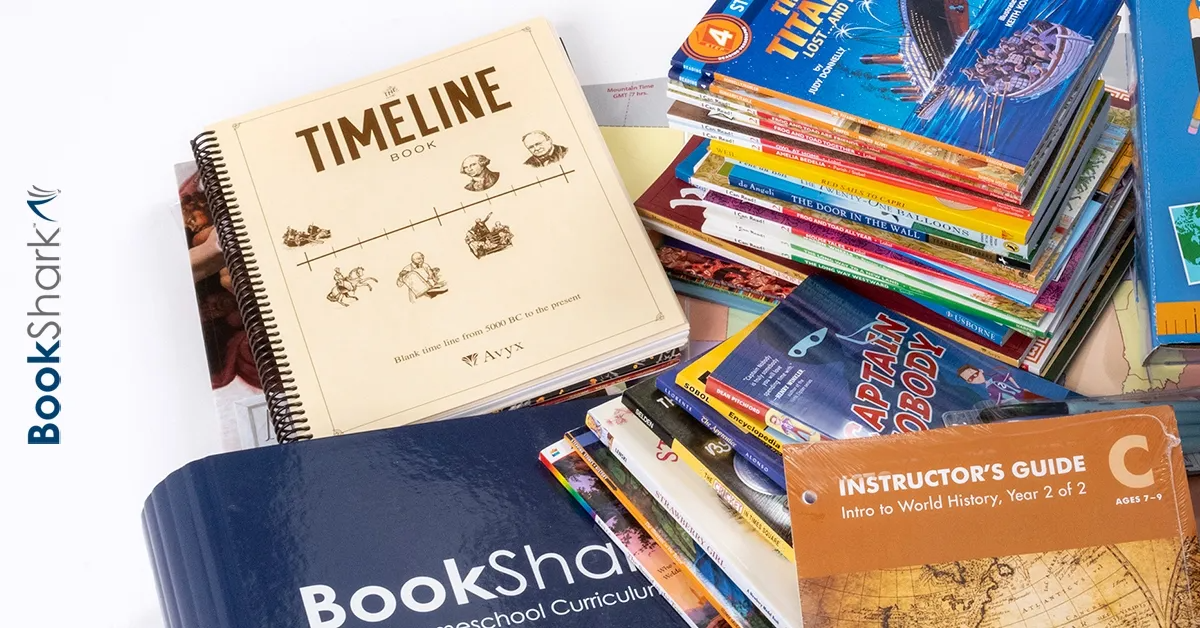
    Homeschool timelines are incredibly versatile. They can be kept in a binder, hung on a wall, or even written on adding machine tape, They come pre-printed (like BookShark’s Timeline Book), or students can make their own. Whatever format you choose, consider these five benefits to making one part of your homeschool history studies.

    1. Homeschool Timelines Help Kids Make Connections

    A timeline acts as a way to tie history together. As students add people, events, scientific discoveries, and inventions to their timelines, they discover how these smaller puzzle pieces fit together into the bigger picture of history.

    Teaching tip: Color code your timelines. For example, you can write people’s names in red, events in blue, etc. Or you can assign specific colors to countries and label anything to do with that area in the same color. Just keep a key for reference.

    2. Homeschool Timelines Provide a Way to Organize Learning

    Many parents enjoy a chronological approach to studying history, so using a timeline makes perfect sense. But there are also times when you may want to follow a rabbit trail—something your kids are interested in studying or a current event you want to take advantage of, like the Olympics or US Elections. 

    When you use a timeline like BookShark’s The Timeline Book, students can add to it even when they aren’t studying history sequentially. They will see how their current studies fit into the broader scope of history.

    Teaching tip: Have students memorize a few key dates. These can become pegs to hang their learning on. For example, while studying the American Revolution, knowing what happened in 1776 is essential.

    3. Homeschool Timelines are the Perfect Review

    With a timeline, students have the opportunity to look back over what they have learned and review it. And when you ask questions about their timelines, it can be an informal method of evaluation.

    Teaching tip: Have students show off their timelines. When they are sharing it with grandparents, aunt, uncles, etc, they will naturally be telling others about what they learned. You’ve covered narration and review at the same time!

    4. Homeschool Timelines Develop a Global Worldview

    Students can see what was going on in different parts of the world at the same time. For example, using a timeline when studying inventors and inventions shows students that ideas were often being worked on concurrently, but in different ways. 

    • Thanks to a timeline kids will realize that Christopher Columbus and Leonardo da Vinci were contemporaries. 
    • They will marvel that Socrates, Buddah, and Confucius all lived at around the same time period. 
    • And they may be surprised to learn that while Europe was mired in the Dark Ages, the Islamic Empire and China had a flowering of science and art.

    Teaching tip: When working on your timelines, look for overlap. Prompt them to consider, “How did people from around the world contribute to this event, idea, etc.? Does this event remind you of something else in history? While this is happening here, what’s happening elsewhere?”

    5. Homeschool Timelines Show Patterns in History

    Timelines help students discover patterns in history. You’ve probably heard a variation of George Santayana’s observation, “Those who cannot remember the past are condemned to repeat it.” By using a timeline, students see certain patterns emerge. Rising tensions, war, times of economic depression, times of prosperity—these tend to cycle in almost every developed nation around the world. 

    When students look back over their timelines, they can find specific types of events more easily and compare to current events. The 2020 pandemic is the perfect time to look back and see when a disease or illness has had a major impact on society.

    Teaching tip: Questions help your student develop critical thinking skills. Instead of simply adding a person or event to the timeline, ask them if they’ve noticed any patterns. Be specific, especially with younger students. For example, “Have you noticed any similarities about events before a war begins?”

    Why You’ll Want BookShark’s Timeline

    Timelines are such a valuable tool for homeschool history that every BookShark Reading with History curriculum package includes a Timeline Book as part of the required resources. Of course, if you use BookShark more than one year, you don’t need a fresh Timeline Book each year. You can continue placing figures in the same Timeline Book throughout your entire homeschool career. The spiral-bound notebook format is especially practical:

    • includes pre-printed dates from 5,000 B.C. to the present
    • constructed of quality, heavy-gauge paper that holds up over time
    • is in a standard 8 ½ x 11” size so it’s easy to store on the shefl or take with you on the go
    • includes plenty of space for figures, notes, and drawings

    Even if you’ve never used a timeline in the past, it’s never too late to start! And if you get behind in placing your scheduled figures, no worries! Just have a timeline book day when you review what you’ve learned and affix all the figures you’ve covered in the last few months. pics they are interested in and can relate to, ask questions that spark opinions and more questions, and get excited about what will happen next. Your kids will follow suit and you’ll be digging in and having valuable discussions with them before you know it. 

  • 10 YouTube Videos for Exploring Central America

    10 YouTube Videos for Exploring Central America

    This year in our homeschool we will be studying Central America. Although we have a great collection of books to read about the topic, I also wanted to find age appropriate videos that show us more about the different countries we’ll be visiting. As much as we adore a literature-based homeschool curriculum, we still love adding on the visual component with online streaming.

    I turned to YouTube and found many good picks that I know will enhance our learning. I often turn on YouTube during breakfast or lunch for a special treat. We’ll spread out a blanket and have a carpet picnic while learning more about the world around us. Here are some of the videos we’ll be using for our exploration of the continent of Central America.

    1. Mexico Vacation Travel Video Guide

    This 50 minute video by Expoza Travel is an in depth look at all there is to see and do in Mexico! You may add a few things to your vacation bucket list after you watch this enticing video!

    2. Belize Beach and Jungle Adventure

    We have always loved watching the Travel With Kids series of videos,and this 30 minute episode follows our favorite traveling family as they explore the beaches, jungle, and culture of Belize.

    3. 7 Facts About Guatemala

    While this short 3 minute video will require an adult to read to younger children, it was very informative—teaching us all sorts of wonderful snippets about the country. This would be a good one for filling out a note taking sheet as you watch.

    4. A Child’s Day in El Salvador

    This quick 2 minute video takes the viewer through a day in the life of a child living in El Salvador. I find my kids relate well to these types of narratives that help them imagine themselves living in the land we are studying.

    5. This is Honduras

    This 13 minute video follows a brother and sister pair of high school students as they volunteer in a Students Helping Honduras program. I loved that this combines the culture and people of Honduras with humanitarian service. 

    6. The Panama Canal

    This 5 minute video by How Stuff Works not only explains how the canal works but goes into a bit of the history of the canal, including its construction.

    7. Costa Rica Animal Rescue—Are We There Yet?

    This 7 minute video by National Geographic features two young kids who are learning about some of the animals which live in the rainforests of Costa Rica.

    8. Life in Central America by Patrick Ross

    This 7 minute video is set to music and, through a montage of videos, shows what life is like in both Honduras and Nicaragua.

    9. Top 10 Facts About Mexico

    This 11 minute video by Most Amazing Top 10 takes the viewer through some pretty interesting facts about Mexico. (Please note that fact #5 is all about crime and drug cartels and as such may not be appropriate for all children. Please preview.)

    10. Kids Sea Camp Utila Honduras

    Another 30 minute video by Travel with Kids focuses on the island of Utila just off the coast of Honduras. The film explores both above and below the water.

    We find that videos make a great jumping off point for diving into a new territory or a fun wrap up of a lesson we’ve just covered. If you like this post, you will probably also love these video lists for other continents:

    About the Author

    Joanne Rawson is the author of the blog Our Unschooling Journey. Known around the web as Mother of 3, Joanne began her blog when she first started homeschooling her three boys in 2012. She lives in Connecticut with her family and enjoys reading, crafting, and traveling… all of which usually ends up on her blog.

  • Using Project-based Assessment for Reading with History

    Using Project-based Assessment for Reading with History

    Are you trying to figure out how to assess your child’s learning with Bookshark’s Reading with History? When using this wonderful curriculum, you may feel a little unsure when you reach the end of a topic or when you try to document your child’s learning. But don’t despair. There are many creative ways you can document and assess your child’s learning. And the best part? No tests required

    Assessments of learning need not include tests and book reports, yet this is often the default for measuring history knowledge.

    When I was growing up, we generally followed the same schedule for each chapter in our history textbook: Read, take notes, answer end-of-chapter questions, end with a unit test. There was nothing of substance and it led many children, myself included, to dismiss history as boring and irrelevant. 

    Wrong! History is an incredibly interesting topic, serving as the map of how we got where we are today. It’s a blueprint to remind us not to repeat some aspects of our history as well.

    BookShark’s Reading with History offers the unique opportunity to get creative when assessing learning.

    While these changes may be totally unlike your view of traditional education, a curriculum free of textbooks and tests makes room for authentic project-based assessments instead. 

    My favorite way to choose projects is to chat with my child to see what she might like to do for the project. Here are five standbys for project-based assessments that we turn to often.

    1. Keepsake Book

    Reading with History is categorized by age range, with literature chosen to cover various topics within certain times in history. Children can read each book and then create their own keepsake history book by making an illustration or writing a piece that represents a memorable moment from that time in history. Continue adding pages with each new topic covered. Let them create and decorate a cover, a title page, and voila! 

    2. Digital Presentation

    Since children typically enjoy using computers, a digital presentation is a wonderful way to present what they learned. Children can include images, text, and even music within this program to create a presentation that displays memorable moments from history. 

    3. Dioramas

    Dioramas are 3-dimensional models, created in miniature, or in large-scale, as you would see in a museum. Children can use shoeboxes and decorate them to represent a scene from a moment in history. For older children, you might want to also include a written component where they describe in more detail what the diorama represents and why it is important. 

    4. BookShark Lap Books

    Lap Book Kits are amazing for compiling the important information covered in the curriculum. I love the simplicity of the papercrafts because it makes learning the focus, which can sometimes get lost in the details of more complicated projects. 

    5. How Might It Have Been Different? 

    Imagine if one important component of the time period were missing. How might the world look today?

    • If, for example, the Egyptians never learned to embalm the dead, how might things be different in that area?
    • If the Europeans had never made it to the Indies, how might America look today?

    Have older children explore this based on what they are learning in history and have them write an informative piece to cover this. 

    How to Create a Rubric to Evaluate the Project

    One of the keys to success with project-based projects is getting your children involved in the evaluation process, for example with a rubric. A rubric is a tool that shows your child what is expected for the project and the corresponding grade for each level of fulfillment. 

    A clear rubric that you both agree on ahead of time eliminates the arbitrary feeling of subjective grading. Again, it is a great idea to get children involved in this as well, even letting older children make the entire rubric themselves prior to starting the project. 

    What do you expect to see in the final project? Note, this will look unique based on the project that is chosen. Give points value for this.

    • A narrowed topic
    • A certain number of examples to support the topic
    • A bibliography (for older children) 
    • A certain number of reliable sources
    • Will you count appearance as part of the grade? If so, give points value for this. 
    • Was the project completed on time? If you follow a more structured schedule this might be included on your rubric. Give points value for this. 

    Making history fun and relevant is important for helping children make connections and build a solid foundation of knowledge that they can carry forward in their education. Project-based assessments give children the opportunity to get their hands busy and their creative ideas flowing. 

    About the Author

    Resa Brandenburg is a former teacher who is now passionate about unschooling her daughter. She lives with her husband in an old farmhouse by the river in Kentucky. Her favorite thing to do is spend the afternoon with her family, including her grown sons and two grandchildren. Her hobbies include traveling, reading, and quilting.

  • Why Elementary Kids Need History & Science Alongside the 3Rs

    Why Elementary Kids Need History & Science Alongside the 3Rs

    On social media or while talking to other homeschool moms, new homeschoolers often ask how much time they should expect their school days to take, or what subjects they should cover. Inevitably, some more experienced parents advise them to simply make sure they cover the basics of language arts and math, or tell them they don’t need to do school more than a few hours a morning during the elementary years. 

    Although there’s nothing wrong with thinking through a schedule—what you will cover each day and how long it might take—there’s a danger when we seek the opinions of others who may not share our view of homeschooling. We can end up with a focus on doing the minimum required instead of nurturing the natural wonder and curiosity of childhood. We begin to view school as the things we have to do instead of the privilege of inspiring a love of learning. 

    Thomas Berry, twentieth century cultural historian said, “Our children should be properly introduced to the world in which they live.” There’s a lot of wisdom in that statement. 

    The Elementary Years Are for Exploration and Discovery

    When we see learning as an adventure, we can inspire our children to view it in the same way. Instead of trying to figure out the minimum of what we can do, we need to ask how we can open up the world for our children.

    “Teaching is not about answering questions but about raising questions—opening doors for them in places that they could not imagine.”—Yawar Baig

    Young children are naturally curious. If you don’t believe that, spend time with them and count the number of times they ask why! Their questions aren’t easy to answer either. Consider one of the most common questions, “Why is the sky blue?” How do you explain the science in a way a young child can understand?

    As homeschoolers, we want to encourage that curiosity, and learning history and science during the elementary years is all about exploration and discovery. 

    The times, people, and places that can only be visited through books open up a world bigger than the one they know. It captures their imaginations and answers so many of those burning why questions. 

    History and Science Strengthen Core Subjects

    Traditional education models often separate subjects into neat little boxes. It’s the way most of us who attended public or private school grew up learning. We went to English and math and science classes—often moving from one classroom to the next. The early elementary years weren’t much different except we may have stayed in the same room. 

    With a literature-based approach like BookShark’s, subjects aren’t taught in isolation from one another but as a connected set of skills and knowledge. 

    Students read about history using living books. They learn language arts skills through copywork and dictation taken from those same books. They write about what they are learning—strengthening their writing skills while assimilating their knowledge of history.

    BookShark Science includes a collection of real books, not textbooks, with hands-on experiments and activities. Students use math skills such as measuring and reading charts and graphs. 

    As students study and practice the skills of core subjects alongside the knowledge they encounter in history and science, they learn and remember. Our brains are designed to make connections.

    “As we learn something new, cells that send and receive information about the task become more and more efficient. It takes less effort for them to signal the next cell about what’s going on. In a sense, the neurons become wired together.” —Alison Stevens, Learning Rewires the Brain

    History and Science Prepare Students for Future Studies

    Studies have shown that children who are read to and have access to books are better equipped to learn to read when they go to school. It makes sense that the same principle applies when it comes to learning history and science. 

    Extensive exposure to science and history will help them understand those subjects in a deeper, more complex way as they mature because they have been exposed to more concepts and scientific vocabulary.

    BookShark History: The Story

    Consider the etymology of the word history: “relation of incidents” (true or false), from Old French estoire, estorie “story; chronicle, history” (12c., Modern French histoire), from Latin historia “narrative of past events, account, tale, story”… 

    History is about story.

    From the beginning of time, people passed down their history through stories. We remember stories better than a list of facts because story connects us and captures our imaginations. That’s why BookShark’s use of historical fiction and biographies fascinates elementary age children.

    BookShark Science: The Spiral Approach

    With BookShark science your children will learn about scientific ideas in a way that engages their curiosity in the elementary years through living books and hands-on experiments. Because BookShark uses a spiral approach, students encounter topics multiple times at more and more complex levels. Students can then build on that foundation in middle and high school years.

    Your Elementary Students Need History and Science 

    Yes, need. Need means we require (something) because it is essential or very important. 

    When we see the elementary years through the lens of only what we have to study, we do a disservice to our children. 

    Although the core subjects of language arts and math lay a foundation of skills students use throughout their studies, history and science study speaks to the essence of who children are—curious individuals who are waiting to explore and discover the world around them. The study of history and science will strengthen core subjects as they are practiced and applied, and students will be well prepared for higher level learning. 

  • 5 Reasons BookShark’s Kit Changed My Mind About Lap Books

    5 Reasons BookShark’s Kit Changed My Mind About Lap Books

    Hands-on activities are a great way to add variety to your homeschool, reinforce learning, and incorporate creativity. When your children are coloring, cutting, and building, there is opportunity to both review and organize what they’ve learned or even explore rabbit trails of curiosity. One great type of hands-on learning I’ve recently rediscovered is lap booksThese fun papercrafts offer an alternative to boring worksheets while offering a fun opportunity to talk about what your child has learned!

    To be honest though, sometimes lap books can be a bit of a chore for moms. There is a ton of printing, organizing the projects, and gathering supplies. Thus, I was at first a bit skeptical about lap books and hadn’t even given them a fair try.

    But after trying out BookShark’s American History Lap Book Kit, I’m on board! So why do we love BookShark’s Lap Book Kit so much? Here are five reasons my skepticism about lap books dissolved away.

    1. Everything Is Included

    Have you ever sat down to work on a lap book and can’t find a brown paper bag, a cotton ball, or a glue stick? With BookShark’s Lap Book Kit, almost everything that you need to put your lap book together is included. The folder base of the lap book even comes folded and ready to use. When we have used lap books in the past, it took me a few tries to put the folder together correctly! It is massive sanity saver to have all your supplies in the box, ready to go!

    2. The Pages Are Pre-printed

    Often lap books come as a digital file that requires a ton of printing. BookShark doesn’t leave you hanging like that. The set comes with all of the pages pre-printed. You’re saving both time and printer ink. The kit takes 98% of the of pre-planning out of the process; you just grab the pages you need, and you’re set!

    3. The Instructions Are Easy to Follow

    I love doing hands-on activities with my son, but sometimes I have to step away or have him work on his own. With this kit, each activity is covered in the Instruction Booklet with a brief history lesson, a list of needed materials, and clear, colorful, step-by-step instructions. The guide truly makes completing the activities a breeze!

    4. It’s Scheduled in Bite-sized Chunks

    We’ve found some lap books that are a lengthy process to assemble, and my son loses interest about halfway through! With this Lap Book Kit, the 25 hands-on activities are distributed throughout your history lessons. You complete one portion at a time, so it’s fun and interactive—not overwhelming. Often when we pull it out to add another element, my son likes to look back at the others we’ve already added. In this way, the lap book is a perfect vehicle for ongoing review! 

    5. The Activities Are Varied

    This lap book isn’t all about cutting and pasting. The projects incorporate creative writing, coloring, and drawing. When your children are finished with the lap book, they’ll have a collection of work that is uniquely theirs and demonstrates a concrete proof of learning.

    The Lap Book Kit has been a great asset to our homeschool this year, making our history lessons more interactive. Mom bonus—it’s easy to simply pull out and use whenever we are ready for it which is clearly marked in our Instructor’s Guide for Level 3 American History!

    If you are looking for a creative way to reinforce your history lessons this year, we highly recommend an American History Lap Book Kit. It is something we look forward to working on together each week!


    About the Author

    Krista is the homeschooling mom of 3 boys. After 13 years she has learned the value of chilling out, going with the flow and keeping homeschooling fun! She is the blogger behind Far From Normal where she hopes to encourage parents and homeschoolers, and inspire a life lived happily outside the box! 

  • 6 Ancient Egypt Activities to Do at the Kitchen Table

    6 Ancient Egypt Activities to Do at the Kitchen Table

    Are you studying ancient civilizations for homeschool history, for example BookShark Level 1 or BookShark Level 6? If so, you will probably find that ancient Egypt is one of the most fascinating topics you’ll cover. In addition to your scheduled reading, your child will probably enjoy supplementing with interactive, hands-on activities.

    Are these extra activities necessary? Not at all! But some families truly enjoy making crafts and engaging in creative projects, and when those activities can connect to homeschool history lessons, it’s all the better. Here are five relatively simple hands-on activities for ancient Egypt that you can do in your kitchen with supplies you already have in your home.

    Activity 1: Mummify an Apple

    If you search online, you’ll find all sorts of things that you can mummify, including a chicken. If you’d prefer something a little smaller (and possibly less gruesome), try mummifying an apple!

    • Take a large tin can and drill holes in the bottom (so the liquid can drain).
    • Cut an apple into quarters.
    • Put the apple in the tin can.
    • In a separate bowl, mix together 1 cup salt and 1 cup baking soda. Pour this mixture over the apple and set in a place where the liquid can drain.
    • Wait two months before digging out your mummified apple!  

    As an alternative, you can mummify several apples, all in different containers, and take one out every two weeks to see the mummification process as it occurs. This way, your history lesson overlaps into a science experiment!

    Activity 2: Build a Sugar Cube Pyramid

    Buy a box or two of sugar cubes and ingredients for plain white icing (not frosting).

    Have your child figure out how big the base of the pyramid should be based on the number of sugar cubes that you have. She’ll need to determine how many sugar cubes will make up the base and how many levels will be built from there. (Math!)

    Use a piece of sturdy cardboard or a baking sheet as a base. Then simply use white icing as glue to hold the cubes together. If you don’t want to eat the creation later, you could lightly spray it with tan paint or even create an elaborate diorama around it, complete with sand, tiny camels, and the Nile river.

    Activity 3: Build a Toothpick and Marshmallow Pyramid

    If you’d like to build a bigger pyramid than the sugar cube one, try building a pyramid out of toothpicks and miniature marshmallows. The marshmallows connect the ends of the toothpicks, so your child can easily build a very large pyramid.

    Activity 4: Write Your Name in Hieroglyphs

    Print out this translation of the alphabet in hieroglyphs (PDF) and have your child practice writing his or her name. Or try your hand at simple sentences summarizing facts about ancient Egypt for an innovative way to narrate your history lesson. Use the colors traditionally used in ancient Egyptian art to embellish the cartouches you create: green, red, blue, yellow, white, and black.

    Edible Project 5: Mummy Dogs

    This project is silly and not a bit authentic. But it’s fun, so it’s perfect for the little kids. You’ll need one package of hot dogs and a container of crescent rolls.  

    Put one crescent roll on the counter and with a knife, slit it into narrow strips on each side, while leaving the middle intact.  Put the hot dog in the middle, and wrap the hot dog with the crescent strips. Make sure to leave a space for the face.  Bake as directed, and then use a dot of ketchup to make the eyes.

    6 Ancient Egypt Activities to Do at the Kitchen Table

    Edible Project 6: Date Balls

    What a yummy snack! You’ll need 1 cup dried, pitted dates, ½ cup walnuts, two tablespoons water. In a food processor, mix together the dates, walnuts, and water. Puree until a paste consistency. Roll these into balls and enjoy.

    Optionally, you can coat the balls first in 2 tablespoons of honey and then in ¼ cup crushed almonds.

    If hands-on projects and cooking experiments make you crazy, remember, you don’t have to do these to give your children a top-notch education. But if you find you are in a rut, the kids are getting antsy, or you have especially artistic children who are hankering for more crafts, try adding a project into your week on your fifth day without BookShark lessons. If anything else, you will have special family bonding time and you’ll be keeping your kids away from screens for a few minutes. Don’t worry about the product you are creating. Even if it doesn’t turn out quite right, the experience itself is worthwhile.