BookShark

Blog

  • 5 Reasons to Keep a History Timeline

    5 Reasons to Keep a History Timeline

    With history’s constant expansion, it’s easy to understand why homeschooling the subject may feel a bit daunting. How can children begin to grasp how it all fits together? There are so many people, cultures, continents, and events!

    One answer is a history timeline.

    Timelines come in a variety of formats, but one thing is consistent. Whether it’s vertical or horizontal, there’s a dated line that helps students put information in chronological order. 

    Students can create history timelines for a variety of reasons:

    • to study a specific era or region
    • to see the events of a person’s life
    • to trace the development of a particular subject—like the evolution of art or progress of scientific discoveries
    • to compare the histories of multiple countries at the same time
    • to give context to a person’s life or an event

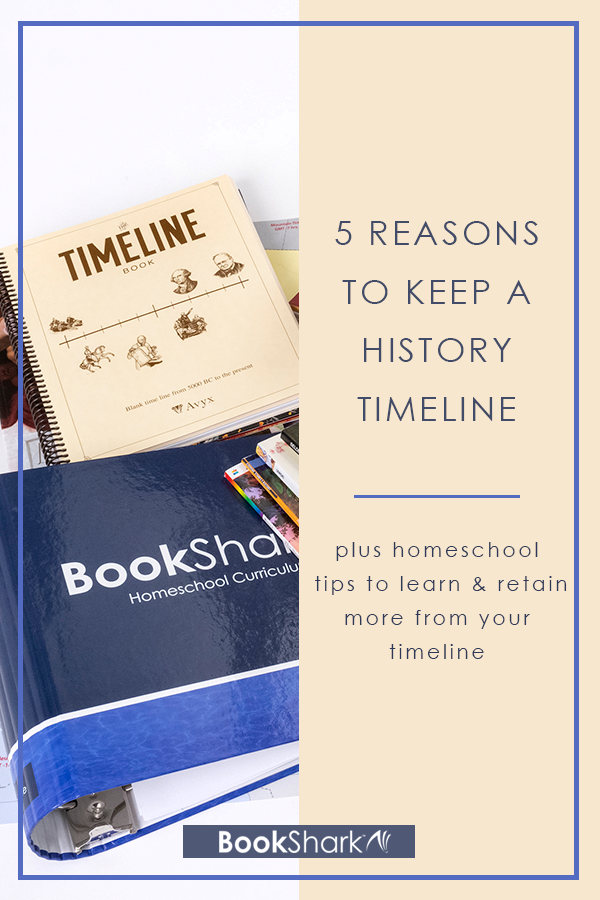
    Homeschool timelines are incredibly versatile. They can be kept in a binder, hung on a wall, or even written on adding machine tape, They come pre-printed (like BookShark’s Timeline Book), or students can make their own. Whatever format you choose, consider these five benefits to making one part of your homeschool history studies.

    1. Homeschool Timelines Help Kids Make Connections

    A timeline acts as a way to tie history together. As students add people, events, scientific discoveries, and inventions to their timelines, they discover how these smaller puzzle pieces fit together into the bigger picture of history.

    Teaching tip: Color code your timelines. For example, you can write people’s names in red, events in blue, etc. Or you can assign specific colors to countries and label anything to do with that area in the same color. Just keep a key for reference.

    2. Homeschool Timelines Provide a Way to Organize Learning

    Many parents enjoy a chronological approach to studying history, so using a timeline makes perfect sense. But there are also times when you may want to follow a rabbit trail—something your kids are interested in studying or a current event you want to take advantage of, like the Olympics or US Elections. 

    When you use a timeline like BookShark’s The Timeline Book, students can add to it even when they aren’t studying history sequentially. They will see how their current studies fit into the broader scope of history.

    Teaching tip: Have students memorize a few key dates. These can become pegs to hang their learning on. For example, while studying the American Revolution, knowing what happened in 1776 is essential.

    3. Homeschool Timelines are the Perfect Review

    With a timeline, students have the opportunity to look back over what they have learned and review it. And when you ask questions about their timelines, it can be an informal method of evaluation.
    Teaching tip: Have students show off their timelines. When they are sharing it with grandparents, aunt, uncles, etc, they will naturally be telling others about what they learned. You’ve covered narration and review at the same time!

    4. Homeschool Timelines Develop a Global Worldview

    Students can see what was going on in different parts of the world at the same time. For example, using a timeline when studying inventors and inventions shows students that ideas were often being worked on concurrently, but in different ways. 

    • Thanks to a timeline kids will realize that Christopher Columbus and Leonardo da Vinci were contemporaries. 
    • They will marvel that Socrates, Buddah, and Confucius all lived at around the same time period. 
    • And they may be surprised to learn that while Europe was mired in the Dark Ages, the Islamic Empire and China had a flowering of science and art.

    Teaching tip: When working on your timelines, look for overlap. Prompt them to consider, “How did people from around the world contribute to this event, idea, etc.? Does this event remind you of something else in history? While this is happening here, what’s happening elsewhere?”

    5. Homeschool Timelines Show Patterns in History

    Timelines help students discover patterns in history. You’ve probably heard a variation of George Santayana’s observation, “Those who cannot remember the past are condemned to repeat it.” By using a timeline, students see certain patterns emerge. Rising tensions, war, times of economic depression, times of prosperity—these tend to cycle in almost every developed nation around the world. 

    When students look back over their timelines, they can find specific types of events more easily and compare to current events. The 2020 pandemic is the perfect time to look back and see when a disease or illness has had a major impact on society.

    Teaching tip: Questions help your student develop critical thinking skills. Instead of simply adding a person or event to the timeline, ask them if they’ve noticed any patterns. Be specific, especially with younger students. For example, “Have you noticed any similarities about events before a war begins?”

    Why You’ll Want BookShark’s Timeline

    Timelines are such a valuable tool for homeschool history that every BookShark Reading with History curriculum package includes a Timeline Book as part of the required resources. Of course, if you use BookShark more than one year, you don’t need a fresh Timeline Book each year. You can continue placing figures in the same Timeline Book throughout your entire homeschool career. The spiral-bound notebook format is especially practical:

    • includes pre-printed dates from 5,000 B.C. to the present
    • constructed of quality, heavy-gauge paper that holds up over time
    • is in a standard 8 ½ x 11” size so it’s easy to store on the shefl or take with you on the go
    • includes plenty of space for figures, notes, and drawings

    Even if you’ve never used a timeline in the past, it’s never too late to start! And if you get behind in placing your scheduled figures, no worries! Just have a timeline book day when you review what you’ve learned and affix all the figures you’ve covered in the last few months. pics they are interested in and can relate to, ask questions that spark opinions and more questions, and get excited about what will happen next. Your kids will follow suit and you’ll be digging in and having valuable discussions with them before you know it. 

  • 8 Ways to Say No to Pointless Busy Work in Your Homeschool

    8 Ways to Say No to Pointless Busy Work in Your Homeschool

    If you’ve ever doubted yourself as a homeschooler, you’re not alone. No matter how many years we homeschool, doubt can get loud. Seeds of doubt plant germinate and sprout when our kids struggle, when we’re tired, when our kids say they are bored, or when learning stagnates. When worry rears its head, our inclination might be to turn to a quick fix or busy work to quiet our fears.

    What is busy work? Busy work is anything we tell ourselves is good for our child knowing full well deep inside it’s a way to keep kids occupied or put a bandaid on whatever is going on.

    Busy work often appears in the form of

    • worksheets you’ll never look at or use
    • excessive practice and problems
    • crafts
    • online learning games
    • educational television
    • flashcards, and workbooks

    While all of these things can be wonderful learning tools if used as such, they can also be pointless. They can be busy work.

    Busy work in education is like the fillers in our food. We can pretend something labeled natural is automatically nutritious. But when we analyze the ingredients label, we see the truth. And at times (especially when we are stressed or exhausted), we tell ourselves our children are learning when children are merely doing something school-like.

    I’m not here to judge. When I was a new teacher, I gave my students busy work. Again, there are a variety of reasons good teachers and homeschoolers use busy work to keep kids occupied. Busy work keeps kids quiet and basically content when other children are learning at different paces, when children are struggling to learn, when a teacher is tired or overwhelmed, and when there isn’t time to plan a more meaningful or hands-on lesson.

    Good teachers and homeschoolers don’t turn to busy work because we’re lazy. We turn to it because we feel something is amiss. When we have that feeling, we need to answer the deeper questions:

    • Is my child struggling or challenged by something we are learning?
    • Is my child complaining about being bored or miserable?
    • Am I comparing my child to someone else?
    • Am I tired or in need of a break?
    • Is my child tired or in need of a break?
    • Are my expectations realistic?
    • Am I looking for reassurance?

    All of these questions point to something other than the need for busy work. And in fact, offering worksheets or mundane practice on something a child already knows, finds boring, or they don’t understand is only going to make the situation worse.

    There are alternatives to busy work, even when we’re tired or feel overwhelmed. Here are eight ways to say no to busy work.

    1. Play

    Children learn through play! Play is just as important, if not more so than anything we are teaching our kids. Rest assured, they are learning! If you need to work one on one with a child, have toys or activities the others can play with independently. Maybe set up an art station, reading corner, or building center. These areas do not have to be complicated or time-consuming to set up. Pull out beads and strings, watercolor pencils and paper, put books in a basket, or grab a bin of LEGO blocks.

    2. Games

    There are countless games that offer practice in reading, writing, math, geography, etc. Children will learn the skills at a faster rate if they are playing. Bonus: playing a game can be the perfect way to both take a break and learn at the same time.

    3. Quiet Times

    If we want our children to learn, our children need rest. A study out of the University of Edinburgh and the University of Missouri looked at the best ways to improve memory. “The participants were asked to listen to some stories and answer questions an hour later. Without the chance to rest, they could recall just 7% of the facts in the story; with the rest, this jumped to 79% – an astronomical 11-fold increase in the information they retained.”

    When our kids aren’t used to resting or playing quietly by themselves, it can take time to help them adjust. Start out with ten minutes of quiet play and work your way up.

    4. Use Group Work or Pair/Share

    We can learn by watching others. If there are skills you want your children to practice, find a friend or sibling they can practice with. The other child may explain the concepts in a new way that helps it stick.

    5. Read

    As long as you’re reading high quality books, reading is never busy work. Read with your child, to your child, listen to an audiobook together, or have a child read silently. 

    6. Focus on What is Going Well

    We all need reassurance, but as homeschoolers, we may have to offer it to ourselves. Keep lists, charts, or bullet journals to remind yourself you are all doing great! Keep track of and encourage yourself by focusing on all the things your child accomplishes during a school day. 

    7. Take a Break

    Give yourself and your child time to process everything you’re doing. Take time to plan, to talk together about what your child wants to learn or needs to learn.

    8. Go Outside

    There are a number of reasons to get kids outside. The outdoors offers places to learn, explore, and exercise. Nature is good for our brains and our well being. Take a walk or head to the creek, the fresh air will reset everyone’s mood and your kids will find all sorts of learning threads to follow.

    As homeschoolers, we have the opportunity to offer our children a quality education over quantity. Our kids do not have to sit in chairs all day, stand in lines, or wait for twenty other children to finish their work. We can set deadlines or not. Our kids can learn inside or out, in the morning or afternoon, and while that doesn’t mean our job as a homeschooler is easy, it does mean we can focus on what our children need and avoid keeping them busy with pointless busy work.

    If after reading this article, you wonder if your entire curriculum may be based on busy work, take a look at BookShark. Meaningful discussions about great books are the heart of a BookShark education. No fluff. No busy work. Request a catalog here

    About the Author

    Kelly left teaching middle and high school English to homeschool her children and reclaim how she and her family spent their time. Followers of interest-led learning, her family’s days rarely look the same, but they tend to include a lot of books, art supplies, and time outside.

    Kelly facilitates local writing circles for women and children and blogs about nurturing the love of learning on her blog, Curiosity Encouraged. She loves to journal, read memoirs, hike, and travel. She seeks quiet mornings and good coffee daily.

  • 25 Ways to Use a Markable Map for Homeschool Geography

    25 Ways to Use a Markable Map for Homeschool Geography

    We all suffer from information overload at times. When there is too much detail or too much to digest, we tend to shut down and not assimilate any of it in a meaningful way.

    The same is true for students. Some learning tools are overwhelming. For example, traditional maps and atlases that have hundreds of labels can be hard to digest. There’s just so much information, students may not know what to zero in on and consequently remember little of what they see. 

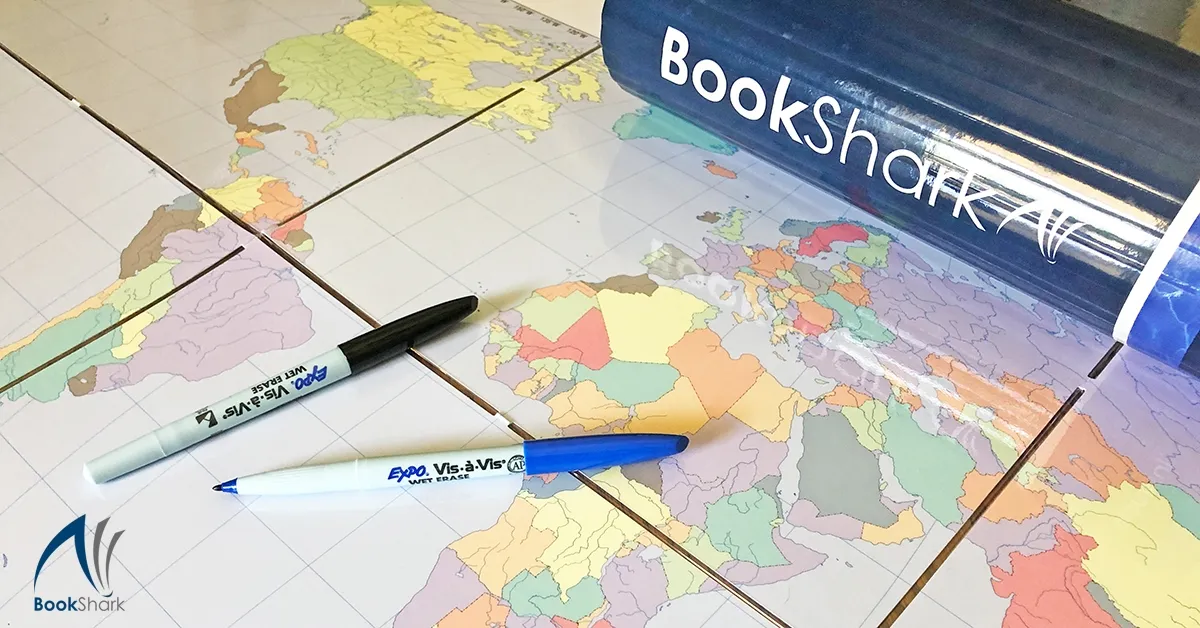
    That’s why the Markable Map sold in the Required Resources of every BookShark Reading with History program (or All-Subjects Package) is such an amazing—yet simple—tool.

    Reasons to Use the Markable Map

    • The Markable Map isn’t pre-labeled like most maps. It’s so open-ended that you can use it for dozens of different applications
    • By doing the work of locating and labeling places on their map, students are more likely to remember what they are learning. 
    • We tend to remember information better when it has a specific purpose or connection to what we are learning. The  Markable Map gives you a way to create that context. You read; then you mark. 

    Fantastic Features of BookShark’s Markable Map

    • This 23″ x 34″, full-colored map can hang on the wall so your students can reference it easily. Tip: If you don’t have room on your wall, pin it to a piece of foam board and store it under a bed. You can prop it up on an easel or a chair during school hours.
    • It’s laminated, so you can use it again and again for a variety of activities.
    • The map has two sides: the United States and the world.
    • All of your students can use it, from kindergarten through high school.

    Markable Map Learning Activities

    You can use the map for a variety of learning activities with students of all ages across subject areas. You’ll only need a few supplies and resources such as Vis-a-Vis® markersan atlas, the Internet, and of course, the Markable Map

    BookShark Instructor’s Guides include suggested mapping activities, so you’re covering geography in an integrated way if you follow the lesson plans. Below are some of the kinds of mapping activities that you may encounter. If geography is a favorite (or a weak spot), you may want to add extra mapping fun into your homeschool routine. 

    For any of these activities, you can have your students include a map key or legend if desired. 

    Geography

    • Learn about the different kinds of landforms and geographical features, then find examples on the map and label them with the term. Create a geography dictionary in a notebook to go along with your study. Draw a picture of the landform, such as a fjord, and define it.
    • Label parts of the map such as lines of longitude and latitude and the equator. Learn what these terms mean and why they are important.

    United States

    • Write the name of the state you are studying and place a star on the capital of the state and label it. Also mark and identify major cities. Include geographical features such as mountain ranges by drawing triangles where they are located.
    • Choose a color for each region of the United States. Outline each state as you study it with a Vis-a-Vis® marker corresponding to the color of the region.
    • Draw a symbol, such as an outline of a car, on each state that you have visited. This is also a great activity to do as you plan a vacation showing where you will be traveling.

    World

    History

    Draw the paths of explorers. Include those who explored lands such as Lewis and Clark, as well as those who traveled across the oceans. 

    Literally track the building of the Transcontinental Railroad as you learn about it.

    Use your map to show where Native American tribes were located across the United States as westward expansion became the focus.

    As you study the history of different parts of the world, add a symbol or simple stick figure style picture on your map where major events took place.

    Show the movement of troops during wars. Talk about the obstacles the geography of the area might have caused for them. 

    History is being made everyday, so locate and label places you hear about in the news.

    Other Subjects

    • When you read about a place in a book, locate it on the map. You can even draw a small copy of the book’s cover to attach to the map.
    • When writing a fictional story, consult the map to find a setting for your story. Think about how the geography of that area would affect the character’s lives. 
    • Use the Markable Map as a visual for a presentation. 
    • Learn about graphing using the lines of longitude and latitude. Give students coordinates and have them draw a circle on the map where those coordinates meet. 
    • Learn about scale and include it in the map keys they create. 
    • Reference the Markable Map when visualizing  math problems dealing with distance.
    • Have students create their own word math problems using the map. 
    • When studying animals, put small pictures of them in the region they are most predominant. Or track migration routes of animals across the world. 
    • Draw small pictures of inventions and place them on the map where they were invented,
    • Label the places different types of music were created or emerged from classical to jazz to rock.

    As your students study different subjects, brainstorm your own family’s  ideas for how to use the Markable Map in your homeschool. You’ll discover it’s an inexpensive investment that yields valuable learning opportunities for the entire family. s with our children. Draw out the topics they are interested in and can relate to, ask questions that spark opinions and more questions, and get excited about what will happen next. Your kids will follow suit and you’ll be digging in and having valuable discussions with them before you know it. 
  • Discussing Books with Kids: How to Foster Valuable Conversations

    Discussing Books with Kids: How to Foster Valuable Conversations

    Have you ever had a conversation like this in your home? 

    Parent: How’s your book?

    Child: It’s good. 

    Parent: Why is it good?

    Child: I don’t know. I just like it. 

    Talking with our kids about a book they are reading can peter out before the conversation even starts. Why? The questions we ask, what we know about the book, and the way we hold discussions all matter. Good discussions are all about connection, and if there is one thing we homeschoolers do well, it’s connecting with our children.

    Looking for ways to having rich, meaningful discussions around the books your homeschoolers read? Here are some of my favorite ways to create conversations. 

    1. Read the Books Your Kids are Reading

    It’s pretty hard to have a conversation about a book you don’t know anything about. We can ask questions, but the heart of a discussion lives in everyone being somewhat informed. 

    If you can’t read the books your kids are reading, find summaries. The more you know about the book, the richer our conversation will be. 

    2. Ask Open-ended Questions

    Questions that have a right or wrong answer, that elicit a one-word answer, or that don’t spark interest will not get our kids talking about books. The questions we ask need to invite them to think about their opinions, the world around them, and who they are as a person.

    Try questions like these:

    • What do you like about this character?
    • What is something that annoys you about this story? 
    • Why do you think the character made that decision?
    • What would you have done in the character’s place? 

    3. Use Reading Strategies

    Reading strategies are tools that help readers think beyond the basic plot of a story. Use reading strategies to craft your questions and discussions: 

    • Predict: Discuss what is going to happen next. Find evidence in the novel to support your predictions. 
    • Connect: Discuss how you each relate to the characters, conflict, or setting. 
    • Question: Discuss what you’re wondering? What doesn’t make sense? What does the author not tell us?
    • Comment: Discuss your opinions. What do you think, like, dislike? 
    • Infer: Discuss what you know by reading between the lines. What are the clues that support your findings? 

    4. Model Excitement About Reading

    Modeling excitement is one of the best ways to create conversation because the more excited we are about reading, the more our kids will be. 

    This next tip may sound silly, but it works! While you’re reading in earshot of your kids, react audibly to your book.

    • Shout, “What?!” when you reach a shocking part.  
    • Laugh loudly when you get to a funny part.
    • Gasp loudly at a scary part.

    When we express what’s going on in our head while we’re reading, our excitement does a couple of things. If you’re reading independently, it sparks interest. Your kids are going to want to know what is so funny or unbelievable, which will spark discussion. If you’re reading out loud together, it’s a great place to stop and discuss what’s going on or how they are feeling. 

    5. Create Conversation Midstream

    While adults often wait until they have finished a book to discuss it, this isn’t always best to do with kids and teens. They need conversation throughout. It will help them stay interested, make sure they are understanding what is happening, and dig deeper. 

    If I’m reading out loud with my kids, we’ll stop and discuss when we’ve ingested a lot of information, get to a really important part, when they are starting to get antsy, before we read and after. 

    If we’re reading the same book independently, I try to create a conversation (even a small one) before and after we read each day. The discussion questions in each BookShark Instructor’s Guide give you perfect conversation starters if this doesn’t come naturally to you.

    6. Be Truly Interested

    Have you ever tried to talk to someone who was looking at their phone or not focused at all on the conversation? It can make us feel pretty small and unimportant. Discussions are conversations. They should look like people paying attention, listening, and truly being interested in what the other person is saying. If you don’t find the books your kids are reading interesting, remind yourself that you are interested in your child and helping them learn. (Or switch to a curriculum full of fascinating books!) 

    7. Have Real Conversations

    Books invite us into real-world problems, historical mishaps, conflicts, and so many lessons. Use a character’s flaws, values, and problems to discuss the best ways to handle struggle and conflict. Books can be wonderful ways to introduce and create conversations around hard topics. Create conversations that are meaningful and go beyond merely discussing a book for school. 

    If you have ever had a really good conversation with a friend about a book, you know the power of discussion, of lifting up the characters you liked, what you each thought and wondered. We can have these same types of conversations with our children. Draw out the topics they are interested in and can relate to, ask questions that spark opinions and more questions, and get excited about what will happen next. Your kids will follow suit and you’ll be digging in and having valuable discussions with them before you know it. 

    About the Author

    Kelly left teaching middle and high school English to homeschool her children and reclaim how she and her family spent their time. Followers of interest-led learning, her family’s days rarely look the same, but they tend to include a lot of books, art supplies, and time outside.

    Kelly facilitates local writing circles for women and children and blogs about nurturing the love of learning on her blog, Curiosity Encouraged. She loves to journal, read memoirs, hike, and travel. She seeks quiet mornings and good coffee daily.

  • Tote Bag Homeschooling: THe Time-saving Solution for an On-the-go Family

    Tote Bag Homeschooling: THe Time-saving Solution for an On-the-go Family

    Are you in a season of on-the-go-schooling? Are you out exploring the world more than you’re at home? I know I am! Museum visits, sports practices, dentist appointments, weekend trips, co-op classes, piano lessons and countless hours in the car blanket our week.

    This constant motion means that our homeschooling has to be flexible. Sometimes reading assignments are tucked into the twenty-minutes hanging out in the waiting room or the forty-five minutes at the library between activities.

    At first, I didn’t think we could fit anything meaningful into these short shifts of learning, but I knew I had to find a way!

    My solution? Tote bag homeschooling!

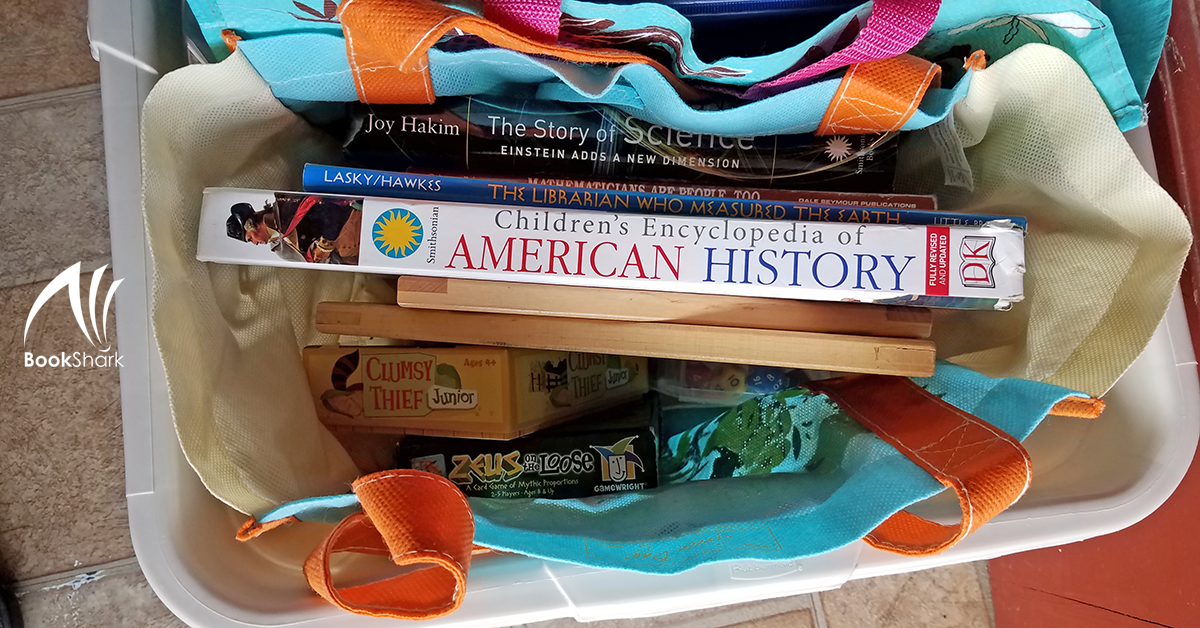
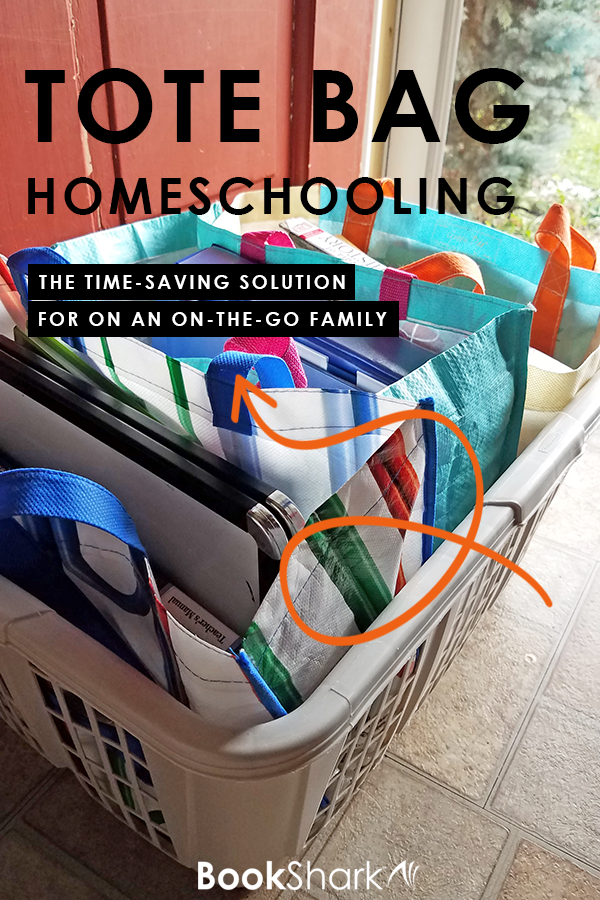
    Next to my front door, you’ll find a laundry basket filled with tote bags of various kinds. As we waltz out the door, staying on track with learning is as simple as grabbing a tote. Let my bags inspire you to build carry-alls that meet the needs of your on-the-go family! 

    1. Tote Bag Homeschooling for All

    If you’re going to set up just one tote, this is the one. It has something for everyone—perfect for family-style learning! Here are some suggestions based on what’s in my own bag:

    • A card game or two
    • A juicy read-aloud
    • Drawing books and colored pencils
    • Journals for freewriting
    • Magnetic white boards 
    • Magnetic letter tiles for word play
    • A tablet for streaming documentaries 

    2. Tote Bag Homeschooling for One

    This kind of tote bag is designed for one learner and is individualized accordingly. Here is what you’d find in a few of ours.

    • Learner, age 6: phonics workbook and early readers, math book, a couple of picture books, a geography sticker book, crayons and unlined paper, audiobook player with earbuds
    • Learner, age 12: atlas and Markable Map, deck of cards for math games, writing journal, historical fiction book, tablet with science videos bookmarked
    • Learner, age 14: laptop for online math lessons and history videos, novel, science book, word roots game, colored pencils and drawing notebook
    • MomInstructor’s Guides, a few math manipulatives, a read aloud book, a box of granola bars

    3. Tote Bag Homeschooling by Topic

    This tote bag is focused on one subject area and the contents will vary depending on the topic. 

    • History Baghistory read-aloud, atlas, geography game, world history encyclopedia
    • Science Bag: field guides, nature notebooks, colored pencils, science books, science-themed games
    • Math Bag: deck of cards, snap cubes, math-themed read aloud, base-ten blocks, math notebooks, dice
    • Reading Bag: early readers, letter tiles, white-boards and markers, word cards, a phonics game
    • Fine Arts Bag: poetry anthology, art books, how to draw guides, markers, colored pencils, oil pastels, books about famous musicians, audio player with earbuds

    4. Tote Bag Homeschooling on a Budget

    This tote bag is inexpensive and versatile! It could be assembled with just a few items from the dollar store! 

    • Library books
    • Notebook and pencils for writing and drawing
    • Dice, a deck of cards, and dominoes for math games

    Homeschooling flows smoothly into the pockets of our days with grab-and-go tote bags! They don’t have to be fancy or overly involved. Build a few totes and line them up in your entryway so you’ll be ready for next day of on-the-go learning. Each bag can fit your family’s needs and the contents can change as often as you’d like them to! 


    With your purchase of an All-Subjects Package, you get a canvas BookShark tote!

    About the Author

    Angela Awald is a homeschooling mama to 6, certified teacher, writer, and doula. Her days brim full of learning, loving, and laundry (lots and lots of laundry)!! She believes that nurturing children (and ourselves) means helping them to see that all of life is about learning – from our mistakes, from each other, and from great books! Angela blogs at nurturedroots.net where she shares the ways she is nurturing her family and inspiration for nurturing your own.

  • How to Homeschool (Well) as a Disorganized Mess

    How to Homeschool (Well) as a Disorganized Mess

    Have you ever heard the myth that homeschool parents need to be extremely organized to successfully homeschool? Maybe you tell someone you homeschool and their reaction is, “Oh! You must be so organized!” Or you attend a homeschool convention and hear speaker after speaker talking about planners, schedules, calendars, and organizational systems as if those are more important that reading aloud and doing science experiments.

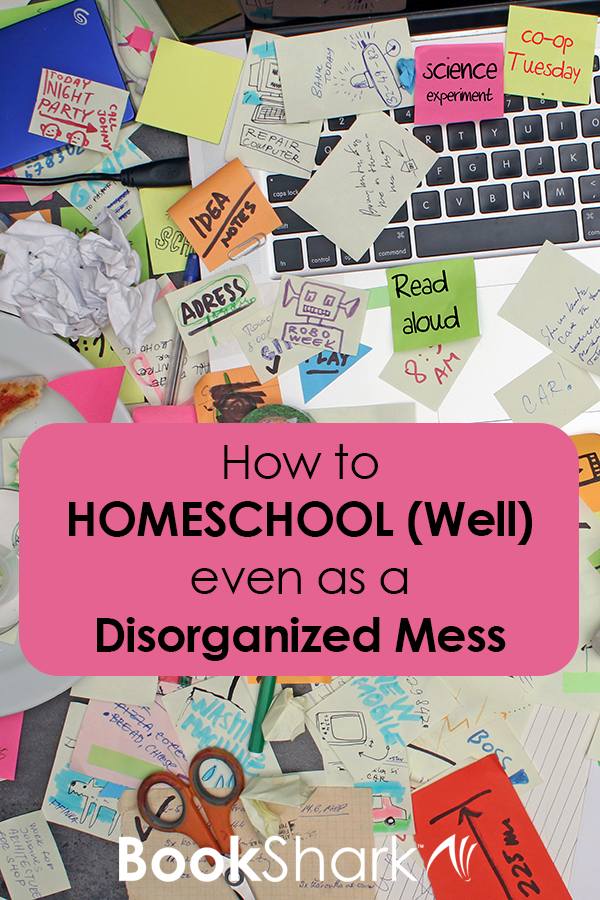
    Well, I strongly disagree with the assumption that you must be organized to be an effective homeschooler, and here’s why. I am a disorganized mess, and we have a very successful homeschool nevertheless!

    What do I mean by a disorganized mess? Here are a few examples:

    • I’ve never successfully maintained a planner.
    • We don’t have a single file folder holding school papers.
    • We use an open and go curriculum because preparing ahead of time never happens.
    • If we can find enough pencils for everyone to write at the same time, it’s a good day.

    Now you may be wondering, “If you are so disorganized, how do you ever get your homeschool work done?”

    First, I think it’s important to point out that kids do not need constant academic instruction. Most homeschooled kids can accomplish a lot of the more academic needs in a much smaller amount of time thanks to the small teacher/student ratio and the ability to move at the student’s pace.

    Second, kids learn a lot through everyday life. We don’t need to have a plan for every moment of the day for them to learn.

    Third, while many parents are organized, there are plenty of parents who are not at all organized. And you never know the whole story of someone else’s life. That super mom you are comparing yourself to may not be quite as organized as she seems from the outside looking in.

    Benefits of Being a Disorganized Mess

    Not many people see benefits to being disorganized. And truthfully, there aren’t many. I cannot tell you how many times I’ve bought two of the same item simply because I forgot I had bought it in the first place. That’s not an advantage of being disorganized.

    But being disorganized has allowed us to be a bit more spontaneous. Since we don’t usually have a set plan, it’s easy to take time off to explore a newfound interest. When we are in the middle of a lesson and my sons want to expand on it, we can. We can drop whatever we are doing and not worry about ruining our schedule (because we don’t follow one).

    How to Get Stuff Done in Your Homeschool

    When your mind opens to the reality of homeschooling, it can be overwhelming to think about all the possibilities that you could cover with your children. There are so many academic subjects plus extracurriculars, field trips, and supplements. I have two steps to combat the overwhelming feeling of trying to get it all done.

    • Simplifying. I write down all the subjects i want to cover in a year (or even semester). Then I rank them in order of importance. For instance, we would put math ahead of science and science ahead of coding, etc. Once I have my list, I consider what I can eliminate. Do I really need to do grammar lessons this year or is it something that could wait until my boys are older?
      I write everything that is left in order of importance and determine a basic routine to get it done. We do math twice a week, reading twice a week, and rotate history and science on a weekly basis. This very simple structure means we get things done without feeling hemmed into a strict regime.
    • Writing down my goals. What are my goals in homeschooling? Do I want my kids to gather all the possible knowledge they can? Or are my goals more about making learning fun? Knowing and understanding my ultimate goal helps me realize what matters and what doesn’t matter. Our main goal is to teach our kids how to learn. When we focus on only that, the overwhelming feeling of getting it all done is simplified to just one task.

    Choose the Right Curriculum

    A lot of successful homeschooling in general is choosing the right curriculum. Homeschooling as a disorganized mess is no different. For me, an open and go curriculum works best. When I can just sit down and start the lesson without prep work, it eases the effect of my disorganization. We are able to start any time we please without organizing the lesson first. I don’t need to have a planner or spend hours a week figuring out what we need to do. I just open the Instructor’s Guide and do the next thing.

    Not all curriculum can be open and go though. Any hands-on curricula will need at least a bit of preparation. I prefer programs either offer a concise material lists of items normally found in a household or a program like BookShark’s science that comes with a kit of required materials. That kit is a lifesaver for a mom who isn’t great at planning ahead.

    So when you’re searching for curriculum, consider how much prep time is required. If you’re a disorganized mess, you might want to stay away from ones that require more planning and stick with something that lets you open up a guide and do the next thing.

    About the Author

    Erin blogs at RoyalBaloo.com where she inspires people to make learning fun!  Through printables, games, activities, and unit studies, learning becomes an adventure worth having.

  • Homeschool Learning Spaces: Organizing Electronic Devices

    Homeschool Learning Spaces: Organizing Electronic Devices

    When you think homeschool learning spaces, the first thing that typically comes to mind is a nature center or a reading nook, or perhaps even an art center. But what about kids’ electronic devices? How do devices such as tablets and computers fit into your plan for a homeschool room?

    Our homeschool is not exclusively digital. We enjoy learning through booksscience experiments, and hands-on projects. But we still have several devices for our kids to use as part of their home education. Unless I stay on top of the device organization, those cords get tangled and tripped over. Laptops and tablets get unplugged and batteries go dead. We don’t have much space in our homeschool room so it’s more important than ever that I stay on top of managing these digital devices.

    How Many Devices Are Needed to Homeschool?

    Our eventual goal is one device per child, whether that’s a laptop, a Chromebook, a tablet, or a raspberry pi. However, for now, we have only been able to pull off three dedicated devices among our seven children. It’s not ideal, but it’s working for now.

    Having almost one device per two children makes it easy to stage and stagger lessons, especially where we still have physical lessons using books and tactile materials.

    We used to only have one device for all seven kids to share, and that was painful. It was incredibly annoying trying to get all of the kids a turn on the one laptop in a timely manner. 

    Choosing Devices For Your Homeschool Room

    Here are five questions to consider.

    1. How many kids are you actively schooling? This one is obvious, but the number of devices you need will obviously fluctuate based upon the number of kids you are homeschooling.
    2. What age are your homeschoolers? Older students will naturally have a need for more electronic time than younger students. If your students are older, you will need a smaller ratio of devices to students than if your students are younger.
    3. What style of homeschooling do you follow? Some styles of homeschooling will have a smaller need for electronics. For example, Charlotte Mason homeschoolers will generally spend more time in books than eclectic homeschoolers. The ratio of devices to students will fluctuate based upon your homeschooling style.
    4. What is your children’s level of independence? Some homeschooling families strive to get their kids working independently as soon as possible while others thrive in a cooperative setting. 
    5. How much money do you have to invest in more electronics? It goes without saying that your finances will determine how many devices you can afford. It might behoove you to buy one or two now and in a few years when you’ve got more money, you can invest in a couple more. 

    Unfortunately, my school room is not very large, but here are a few tricks I use to keep the electronics tidy.

    Child-Friendly Phone and Tablet Cord Organization

    If your kids are anything like mine, I’m sure you have gone through a painful amount of broken charging cords over the years. Even when my kids don’t use the devices, it seems like they are still always breaking the cords, either because the device got tripped over, tugged on, or plugged/unplugged incorrectly.

    I got so sick of always buying new charging cables that I finally invested in magnetic phone cables for our homeschool devices.

    These are great for kids because they are really easy to plug in. Even my 1-year-old can do it. These are also nice because when a cord gets tripped on, nothing gets ripped or bent wrong, and nothing goes flying either. These magnetic cords are a must for any homeschool room that uses portable electronic devices.

    And to minimize the number of plugins we were taking up, I invested in these fun little charger plugins that can accommodate two USB slots instead of just one. Now we can plug in double the devices with half the outlet space. Again, this is a must for a homeschool room with so many homeschoolers.

    Easy Laptop Storage

    We have three laptops in our family. One of these is specifically dedicated to our homeschoolers and our homeschool learning space, while the other two are more for the adults in the family. However, all of the laptops get used by the kids at least some of the time, which means we need a safe space for multiple laptop storage in our homeschool room.

    The nice thing about laptops is they fold up flat, making them easy to store. Right now, we just stack our laptops onto a shelf in our homeschool room. That way they are easy to access for anybody who needs them, but they are out of the way when not in use. Cords just get wrapped up loosely and set on top of the laptop pile until the next time we need them.

    In the past, we have also used small plastic containers to store our laptops. We found an inexpensive container in the dish drainer section of our local grocery store that was the perfect size for holding a couple of laptops with their cords. And as a bonus, our kids’ tablet also fit nicely in this container.

    Simple Electronic Setup

    When all of our devices are in use, you can imagine the tangle of cords that we deal with. On a regular basis, our school room consists of one tablet, one laptop, and one raspberry pi, and it’s not unheard of for us to add two more laptops and a phone or two, when circumstances require. Now that’s a lot of cords.

    In order to accommodate our large homeschooling family, our homeschool room has two extra-long folding tables. One of those folding tables just so happens to have a hole specifically designed for easy stringing of cords and cables, but we have made this setup work without one of these holes.

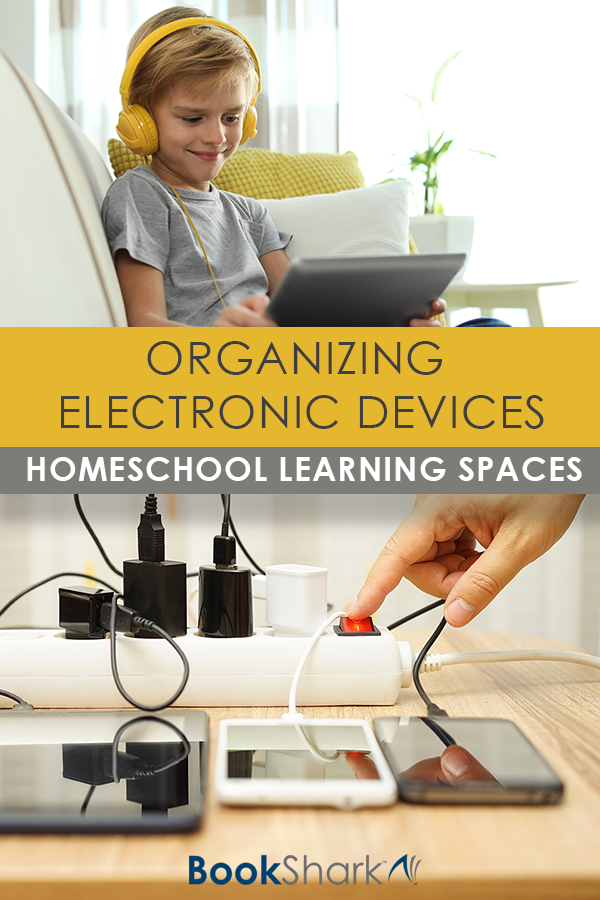
    The key to managing cords for all of these school devices is a multi-plug extension cord. We got a cord that was 6+ feet long and strung it from the wall to the table, up through that hole. We taped the cord down to the floor so the kids wouldn’t trip on it, and we taped the outlet part to the table so it wouldn’t get moved around by the kids.

    Now we still have a bunch of cords strung across our table, but it’s more manageable than if they were strung across the entire house. And this kind of setup would work nicely no matter how many devices or electronics you have in your homeschool room.

    For somebody who naturally struggles with organization, this has been a really simple and effective setup for our large homeschooling family.

    About the Author

    Charlene Hess spent many years teaching before she had her own kids. She now has 7 of her own, whom she has been homeschooling for the last 10 years. Although she still teaches other children outside of her home, she finds great joy in exploring the world with her family.

    Charlene has participated in many leadership trainings with John C. Maxwell. She and her husband blog about their homeschooling and parenting adventures at Hess Un-Academy.

  • 10 YouTube Videos for Exploring Central America

    10 YouTube Videos for Exploring Central America

    This year in our homeschool we will be studying Central America. Although we have a great collection of books to read about the topic, I also wanted to find age appropriate videos that show us more about the different countries we’ll be visiting. As much as we adore a literature-based homeschool curriculum, we still love adding on the visual component with online streaming.

    I turned to YouTube and found many good picks that I know will enhance our learning. I often turn on YouTube during breakfast or lunch for a special treat. We’ll spread out a blanket and have a carpet picnic while learning more about the world around us. Here are some of the videos we’ll be using for our exploration of the continent of Central America.

    1. Mexico Vacation Travel Video Guide

    This 50 minute video by Expoza Travel is an in depth look at all there is to see and do in Mexico! You may add a few things to your vacation bucket list after you watch this enticing video!

    2. Belize Beach and Jungle Adventure

    We have always loved watching the Travel With Kids series of videos,and this 30 minute episode follows our favorite traveling family as they explore the beaches, jungle, and culture of Belize.

    3. 7 Facts About Guatemala

    While this short 3 minute video will require an adult to read to younger children, it was very informative—teaching us all sorts of wonderful snippets about the country. This would be a good one for filling out a note taking sheet as you watch.

    4. A Child’s Day in El Salvador

    This quick 2 minute video takes the viewer through a day in the life of a child living in El Salvador. I find my kids relate well to these types of narratives that help them imagine themselves living in the land we are studying.

    5. This is Honduras

    This 13 minute video follows a brother and sister pair of high school students as they volunteer in a Students Helping Honduras program. I loved that this combines the culture and people of Honduras with humanitarian service. 

    6. The Panama Canal

    This 5 minute video by How Stuff Works not only explains how the canal works but goes into a bit of the history of the canal, including its construction.

    7. Costa Rica Animal Rescue—Are We There Yet?

    This 7 minute video by National Geographic features two young kids who are learning about some of the animals which live in the rainforests of Costa Rica.

    8. Life in Central America by Patrick Ross

    This 7 minute video is set to music and, through a montage of videos, shows what life is like in both Honduras and Nicaragua.

    9. Top 10 Facts About Mexico

    This 11 minute video by Most Amazing Top 10 takes the viewer through some pretty interesting facts about Mexico. (Please note that fact #5 is all about crime and drug cartels and as such may not be appropriate for all children. Please preview.)

    10. Kids Sea Camp Utila Honduras

    Another 30 minute video by Travel with Kids focuses on the island of Utila just off the coast of Honduras. The film explores both above and below the water.

    We find that videos make a great jumping off point for diving into a new territory or a fun wrap up of a lesson we’ve just covered. If you like this post, you will probably also love these video lists for other continents:

    About the Author

    Joanne Rawson is the author of the blog Our Unschooling Journey. Known around the web as Mother of 3, Joanne began her blog when she first started homeschooling her three boys in 2012. She lives in Connecticut with her family and enjoys reading, crafting, and traveling… all of which usually ends up on her blog.

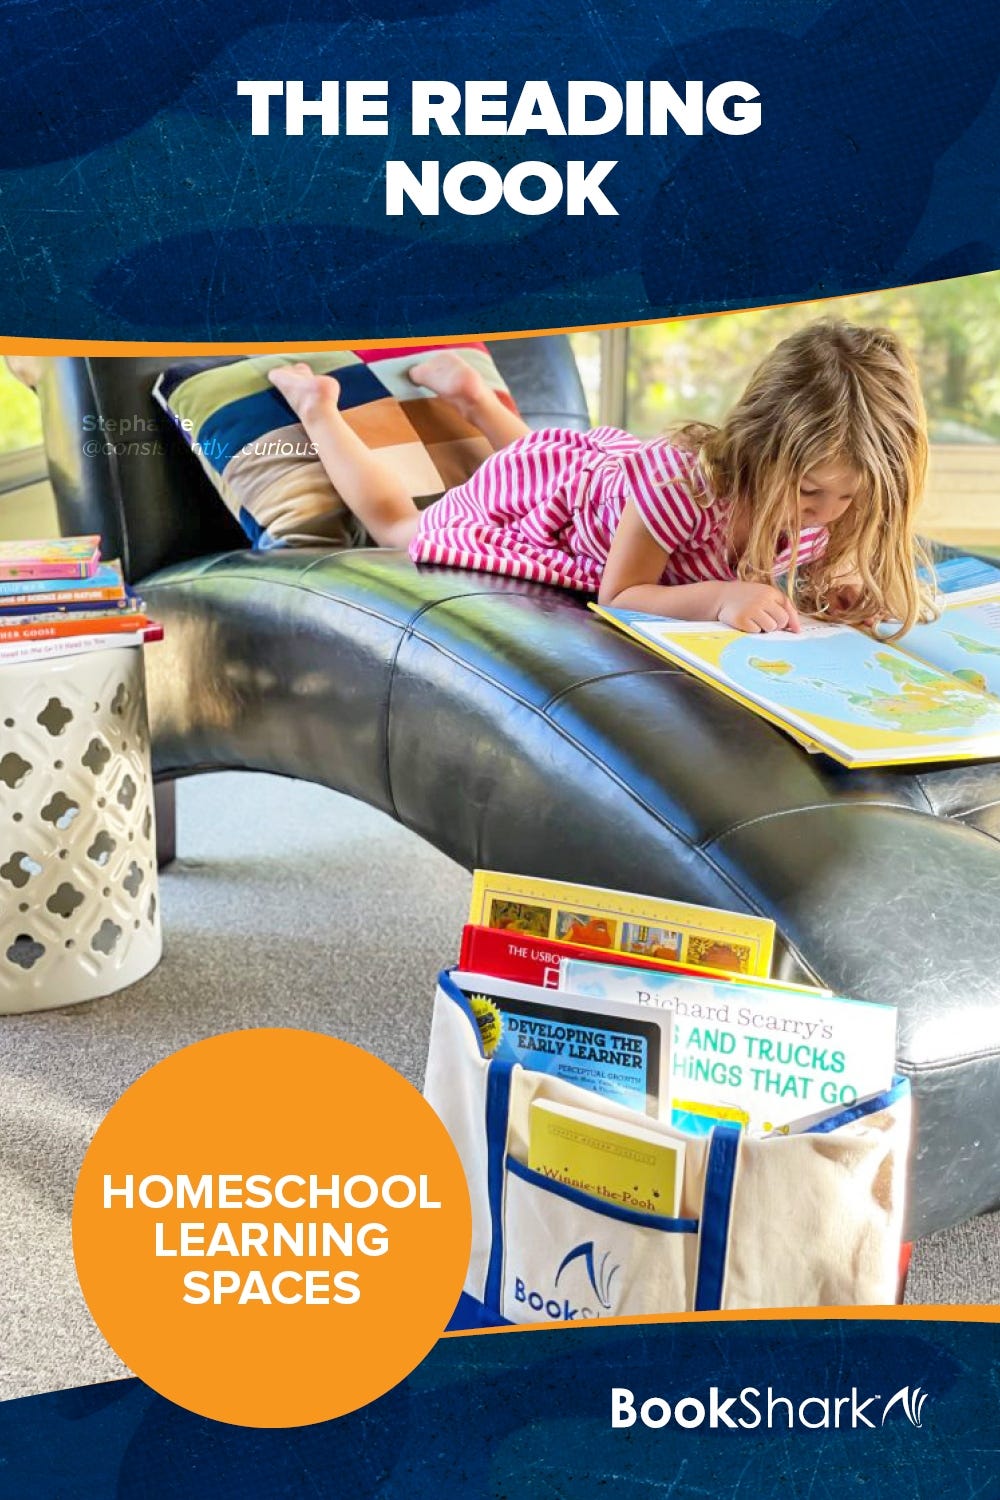
  • Homeschool Learning Spaces: The Reading Nook

    Homeschool Learning Spaces: The Reading Nook

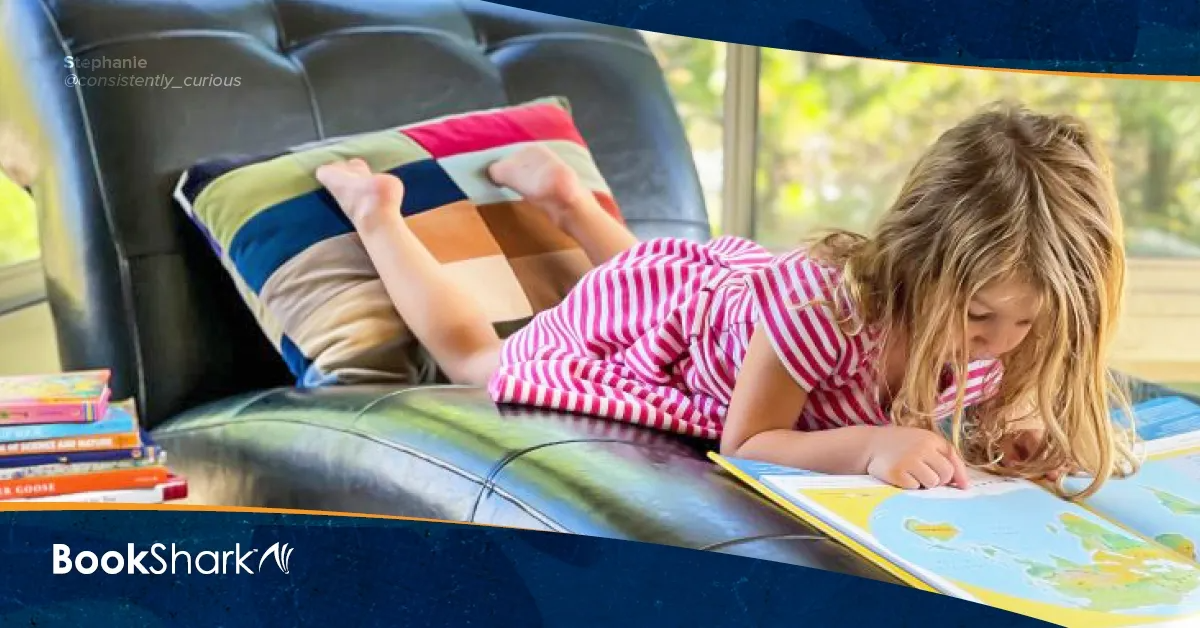
    No matter what style of homeschooling you follow, reading is probably a very strong part of your homeschooling journey because reading is one of the best ways to learn about the world, all from the comfort of your own home.

    • Unschoolers read. 
    • Relaxed homeschoolers read.
    • Charlotte Mason homeschoolers read.
    • Montessori followers read.
    • Classical homeschoolers read. 
    • All homeschoolers read!

    Since reading is a natural part of homeschooling, it’s only natural that you want your learning space to include a comfortable reading nook. But what do you do when you don’t have the space or the money to set up the reading nook of your dreams?

    How to Set Up a Reading Nook When You Have No Space

    Our family has lived in so many houses over the years that we often joke we are semi-nomadic homeschoolers. In all of our homes and in all of our learning spaces, we have somehow never ended up with a nice reading nook or a room dedicated to bookshelves and beanbags.

    But no matter our circumstances, I always make an effort to set up an area that invites the kids to snuggle up with a good book.

    Right now, our homeschool room is a corner in our basement toy room. There is not much space there for beanbags and couches, so the kids tend to do a lot of reading in their bedrooms, on their beds. The kids may keep the books they are reading in their rooms for accessibility, but the rest stay in the basement until they are needed for homeschool lessons. With this book storage system, my kids always have access to great reading material while books that are not in use are stored safely for future enjoyment.

    Informal Reading Space Ideas for Homeschoolers

    You don’t have to have a formal reading nook set up in order to include a reading space in your homeschool.  You can designate these areas for reading, at least part of the time:

    • Living room couch
    • Dining room table
    • Toy room floor (lie on a blanket)
    • Child-sized bean bag chairs
    • Child’s bed
    • Front or backyard (think blanket, lawn chair, porch swing, etc)
    • Cardboard box reading fort
    • Blanket fort

    Really, any place that the kids find comfortable for reading will work.

    Of course the couch or bed isn’t always a reading nook, but during reading time, each place transforms into serving the purpose. Maybe you have a special blanket, pillow, or other prop that signals the place is now being use for reading. 

    If your child is a relucant reader, working together to create an inviting space that’s reserved only for reading (at least during reading times) is a sneaky way to inspire more interest. 

    Think about fabrics, comfortable poses, and lighting when choosing and designing your reading nooks.

    In a large homeschooling family, it can be difficult for kids to find a quiet spot to read. But when there are a lot of comfortable reading options available, kids will have an easier time settling down to devour a book.

    If you have a specific time for independent reading each day, each child can go to their preferred reading nook.

    Practical, Child-Friendly Book Storage

    If you’ve ever tried to mix little kids and books, then I’m sure you have experienced the joys of kids using books as stepping stones – and the damaged books that follow these activities. I am embarrassed to say we have lost more than our fair share of books to this activity. 

    But kids have an easier time taking care of their books when they have an easily accessible spot for book storage.

    Book Storage for Little Kids: Baskets

    I don’t know about other homeschooling families, but I have never been able to get my little kids to put books back on the shelf regularly. And you can bet your bottom dollar that the preschooler is never going to get those books to stand up nicely on that bookshelf.

    So how do I store and organize books in a child-friendly way that still keeps the books accessible and well taken care of?

    Baskets are my solution!

    We have a handful of square wicker baskets for the younger kids’ books. The kids simply have to set their books in the baskets when they’re done reading.

    With the basket method, the books look tidy, they’re out of the way, and nobody uses the books as stepping stones. The real trick is teaching the kids to set the books in the baskets nicely rather than tossing them in from across the room.

    Book Storage for Older Kids: Shelves

    My older kids are capable of putting books on a bookshelf when they are done reading. So in addition to some baskets, we have a couple of bookshelves for their books.

    Sometimes the shelves are a nice fit and the books can stand up properly. Other times the shelves are an awkward fit and the books have to stack on top of each other. But as long as the spine is out and the books are orderly, I’m a happy momma.

    Currently, our homeschool room has really big and awkward shelving units. These are not even close to the proper size for a stereotypical book storage space. But that’s okay. We make do with what we have. One day when I’m rich and have my dream house, I’ll have wall to wall bookshelves filled with books. There will be homeschooling books, educational books, entertaining books, and more. I’ll put Belle’s library to shame. But until then, I am happy with the space, and the book storage, that I have.

    About the Author

    Charlene Hess spent many years teaching before she had her own kids. She now has 7 of her own, whom she has been homeschooling for the last 10 years. Although she still teaches other children outside of her home, she finds great joy in exploring the world with her family.

    Charlene has participated in many leadership trainings with John C. Maxwell. She and her husband blog about their homeschooling and parenting adventures at Hess Un-Academy.  

  • When You Are Afraid People Will Judge You for Homeschooling

    When You Are Afraid People Will Judge You for Homeschooling

    The decision to homeschool your children is a big one. You take on not only the parenting duties you already have but also the responsibility of their education. I’ve never known anyone who has decided to homeschool on a whim. Most people weigh the benefits, the concerns, and all the factors they can think of to make the best decision for their family.

    But even after you’ve made the choice to homeschool, fears can creep in. One big fear that many new (and even seasoned) homeschoolers face is the fear of judgment from others.

    • Maybe your family isn’t supportive of your homeschool journey.
    • Maybe your friends think you’re crazy.
    • Maybe you excitedly shared your decision to homeschool on social media and felt a negative backlash.
    • Possibly none of that has happened yet, but you are paralyzed with the worry that it might occur.

    Whatever the reason, your fear is real. The good news is that it can be dealt with so you can still feel confident in your decision to homeschool!

    1. Be Confident in Your Why

    There is a reason you’ve chosen to homeschool. Maybe it’s the quality of education your child is receiving, or maybe they have special needs. You might be homeschooling because of your family situation or to avoid bullying. There are tons of reasons people choose to homeschool.

    Because homeschooling is such a tremendous commitment, your why is surely something of great importance to you, your child, and your family. Take time to think deeply about your reasons, even writing them down, putting into words all the reasons why you are homeschooling.

    When we have a clear handle on that drive, that desire, that why, it is easier to shrug off judgment and feel confident in our decision. When you know and can clearly articulate that you are doing what is best for your child, you can focus on that assurance when fear of judgment rises. 

    2. Realize People May Be Projecting Their Fears Onto You

    When people say things to you like

    or any other number of objections, realize these statements are usually not about you at all. Often these questions and exclamations say more about themselves than about your choices.

    They realize their own shortcomings and what they would likely struggle with as a homeschooler and are putting their own fears onto you. When confronted with this kind of situation, take a minute to realize this tendency to project fears, and then let them roll off your back.

    Think of your why, be confident in your decision, and don’t other people put their fears onto you! It is likely that their hearts are in the right place—concern for you and your child—but often their own fears color their opinion. They can be concerned, but it doesn’t have to affect you!

    3. Surround Yourself with Like-minded People

    A great way to get over feeling judged about your decision to homeschool is to find a tribe that will make you feel great about it! Find a friend you can talk to who will give you a pep talk when you need it. Join a Facebook group of homeschool moms where you can vent if needed. Knowing you’re not alone in your homeschool challenges helps you feel confident and not worry so much about those who would judge your decision.

    Anytime we take a bold leap in life or make a big change there are bound to be fears and people who question what we are doing. There are people who will judge our decisions, but we can rise above that by knowing that we are doing our best for our families, letting those judgments roll off our backs, and pressing forward on our new adventure!dless of our personal beliefs. We all believe in this—our kids are best served by being educated at home by their parents.

    About the Author

    Krista is the homeschooling mom of 3 boys. After 13 years she has learned the value of chilling out, going with the flow and keeping homeschooling fun! She is the blogger behind Far From Normal where she hopes to encourage parents and homeschoolers, and inspire a life lived happily outside the box!